[实操教程] Dell R730 EXSI 虚拟机 Centos7 直通P40 及跨云组网加入k3s 集群
本教程详细介绍了在 Dell R730 上配置 ESXI 虚拟机和直通 P40 显卡的步骤,以及在 CentOS7 上加入 k3s 集群的操作。主要包括虚拟机安装、系统初始化设置、WireGuard 组网(可选)、k3s agent 安装、显卡驱动安装、Docker 安装与配置 NVIDIA Runtime、以及调整磁盘分区等步骤。
一 、 虚拟机配置
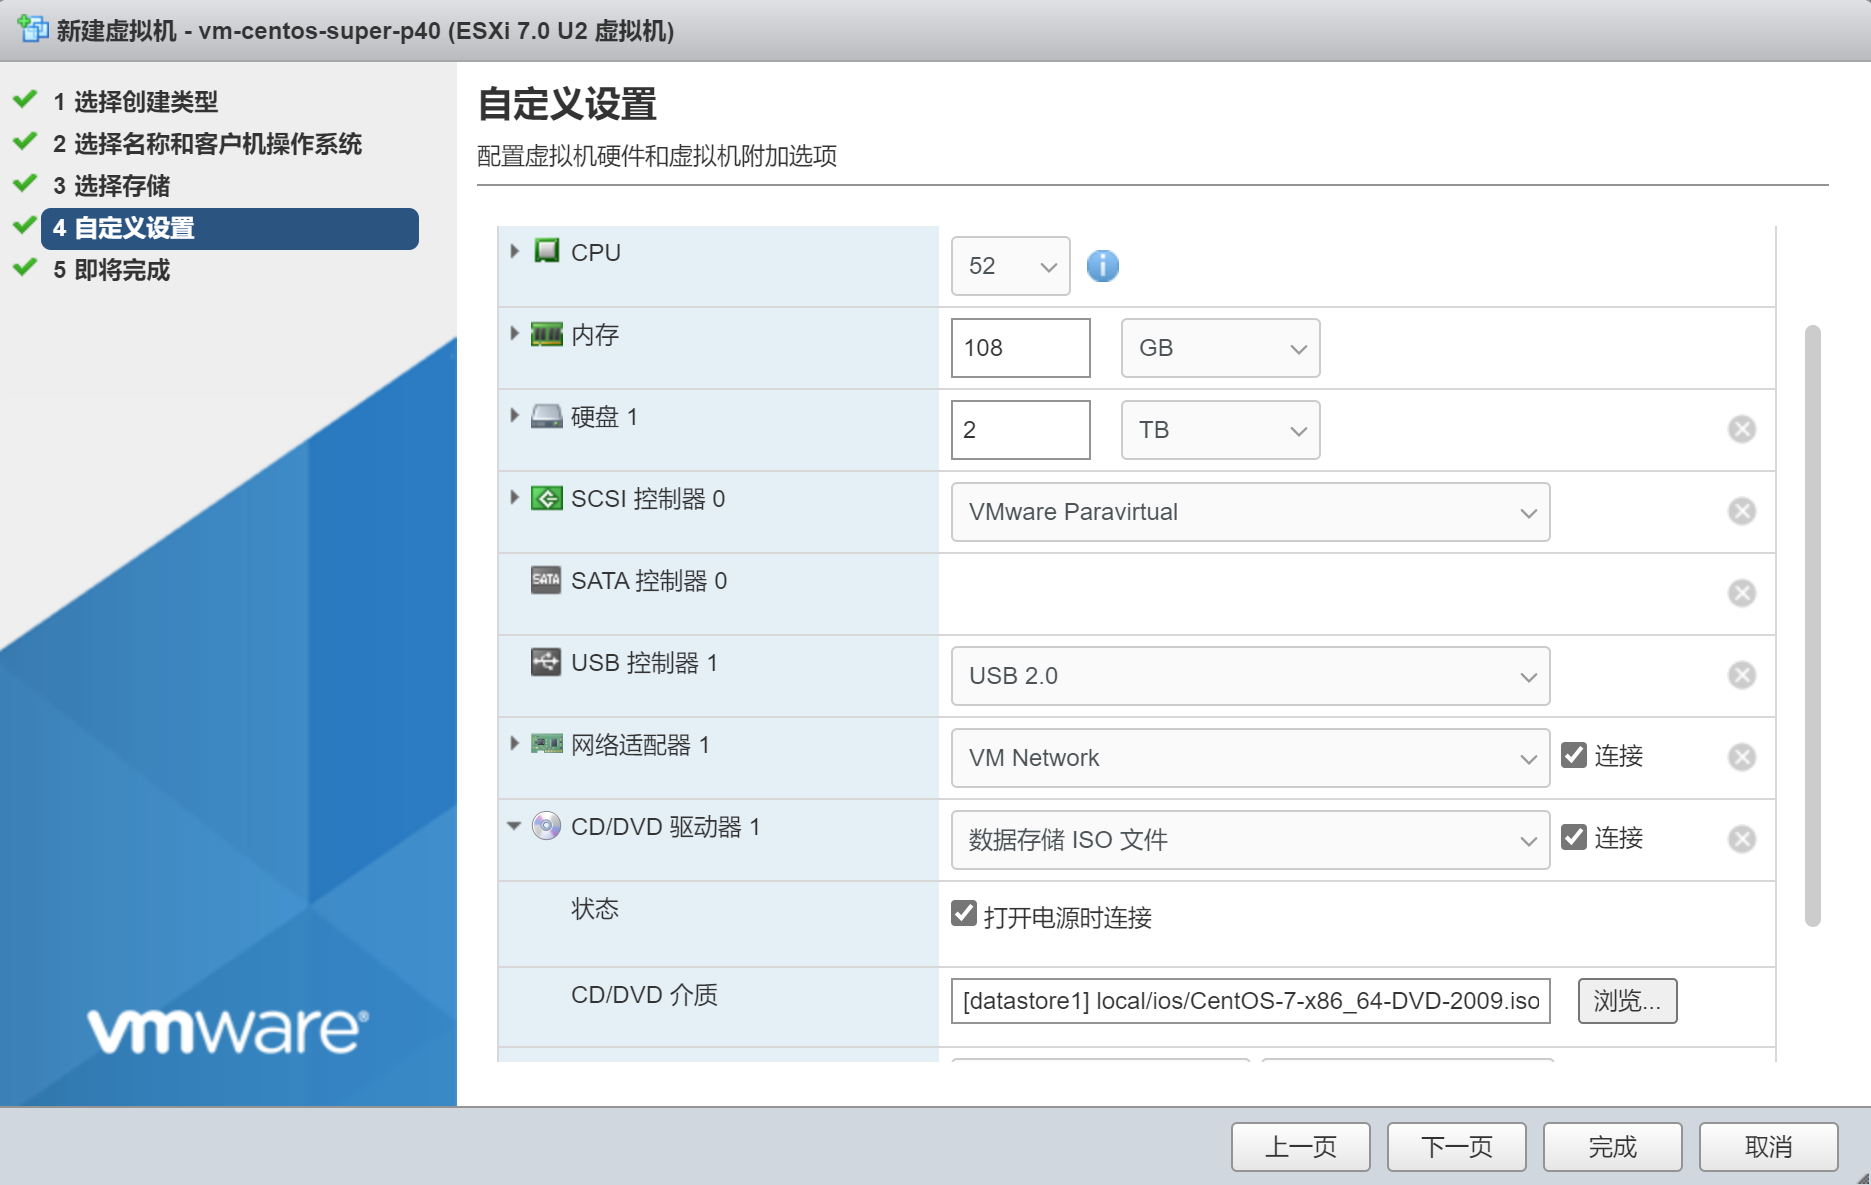
新建虚拟机
分配需要的CPU 内存 磁盘, CD 驱动器选择ISO 文件,需提前下载iso镜像
内存 RAM 和预留内存大小需要一致
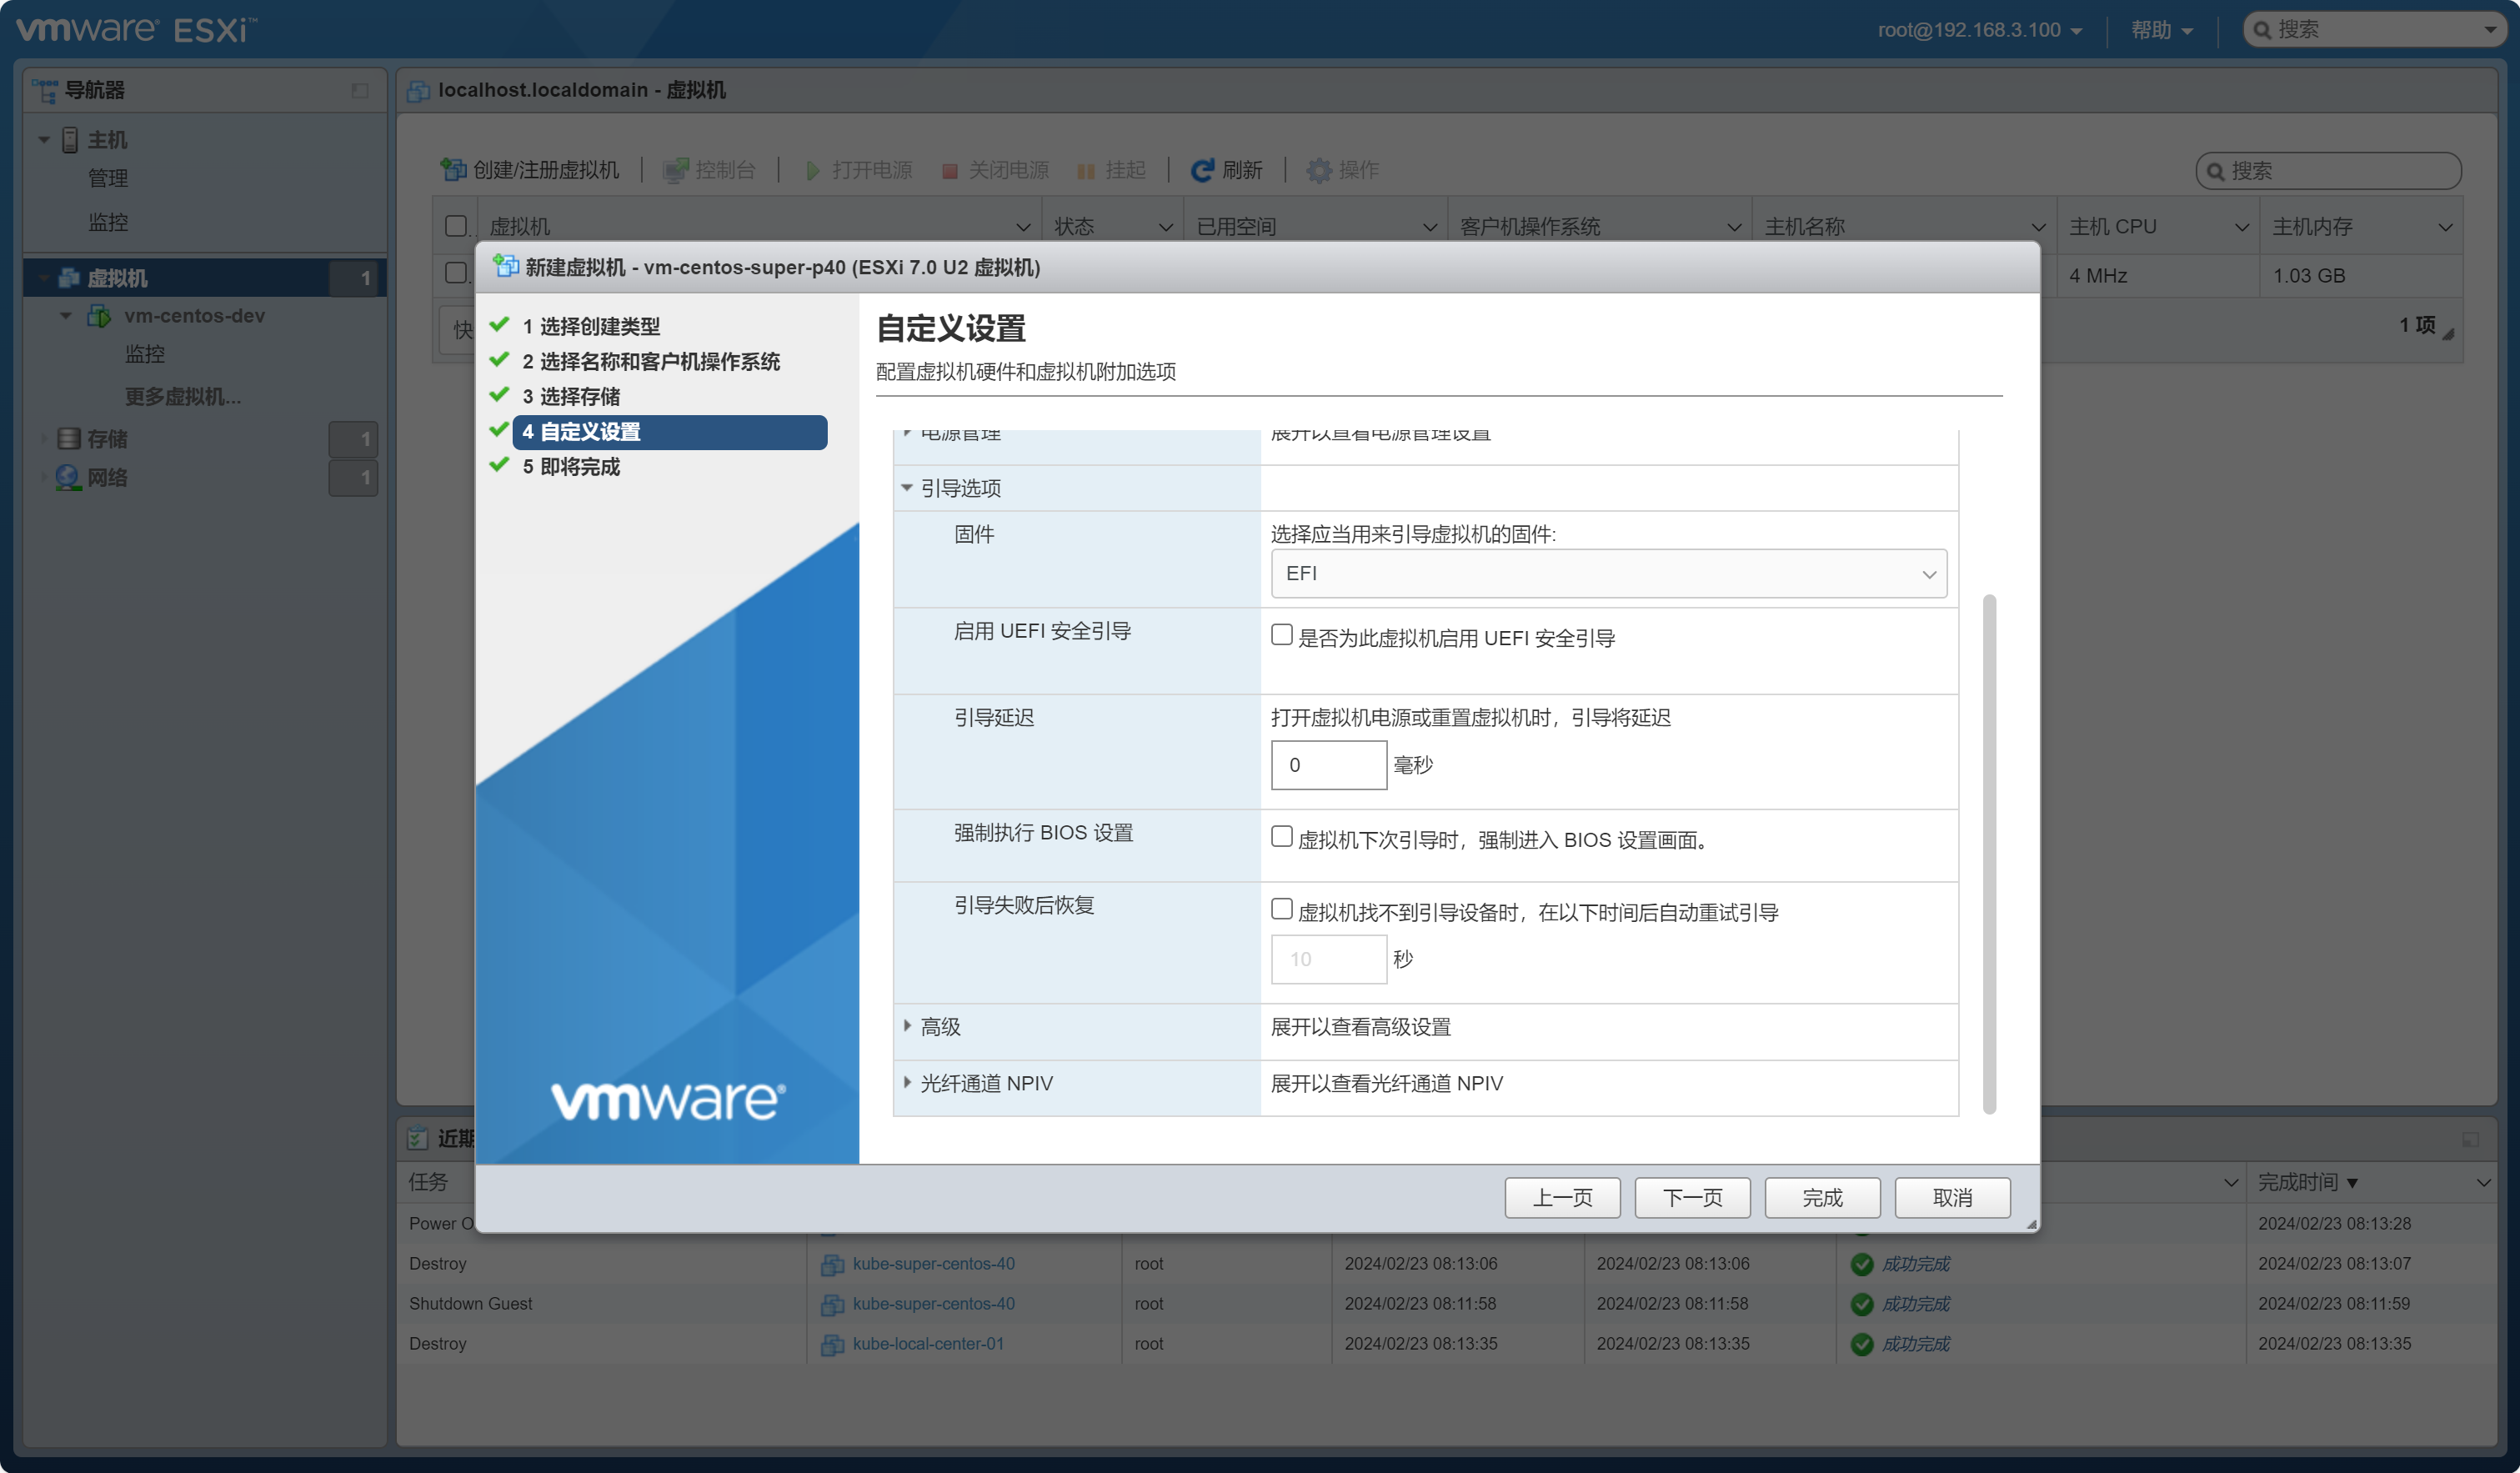
虚拟机选项设置 EFI 引导
显卡添加
【虚拟硬件】>【添加其他设备】 >【PCI设备】 选择P40 显卡

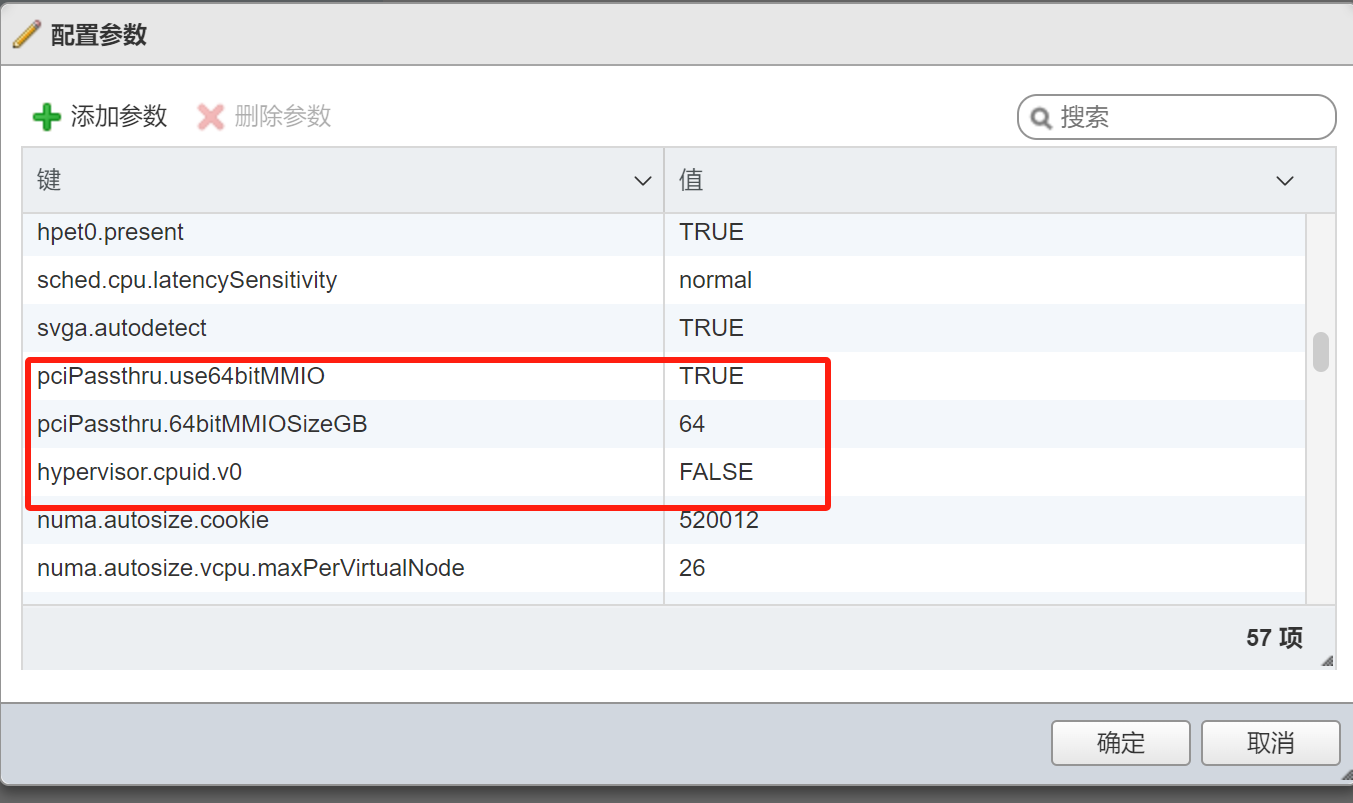
【虚拟机选项】> 【高级】 > 【配置参数】
必须配置以下内容才能开启电源
1 | pciPassthru.use64bitMMIO=TRUE |
Centos 配置
系统安装配置
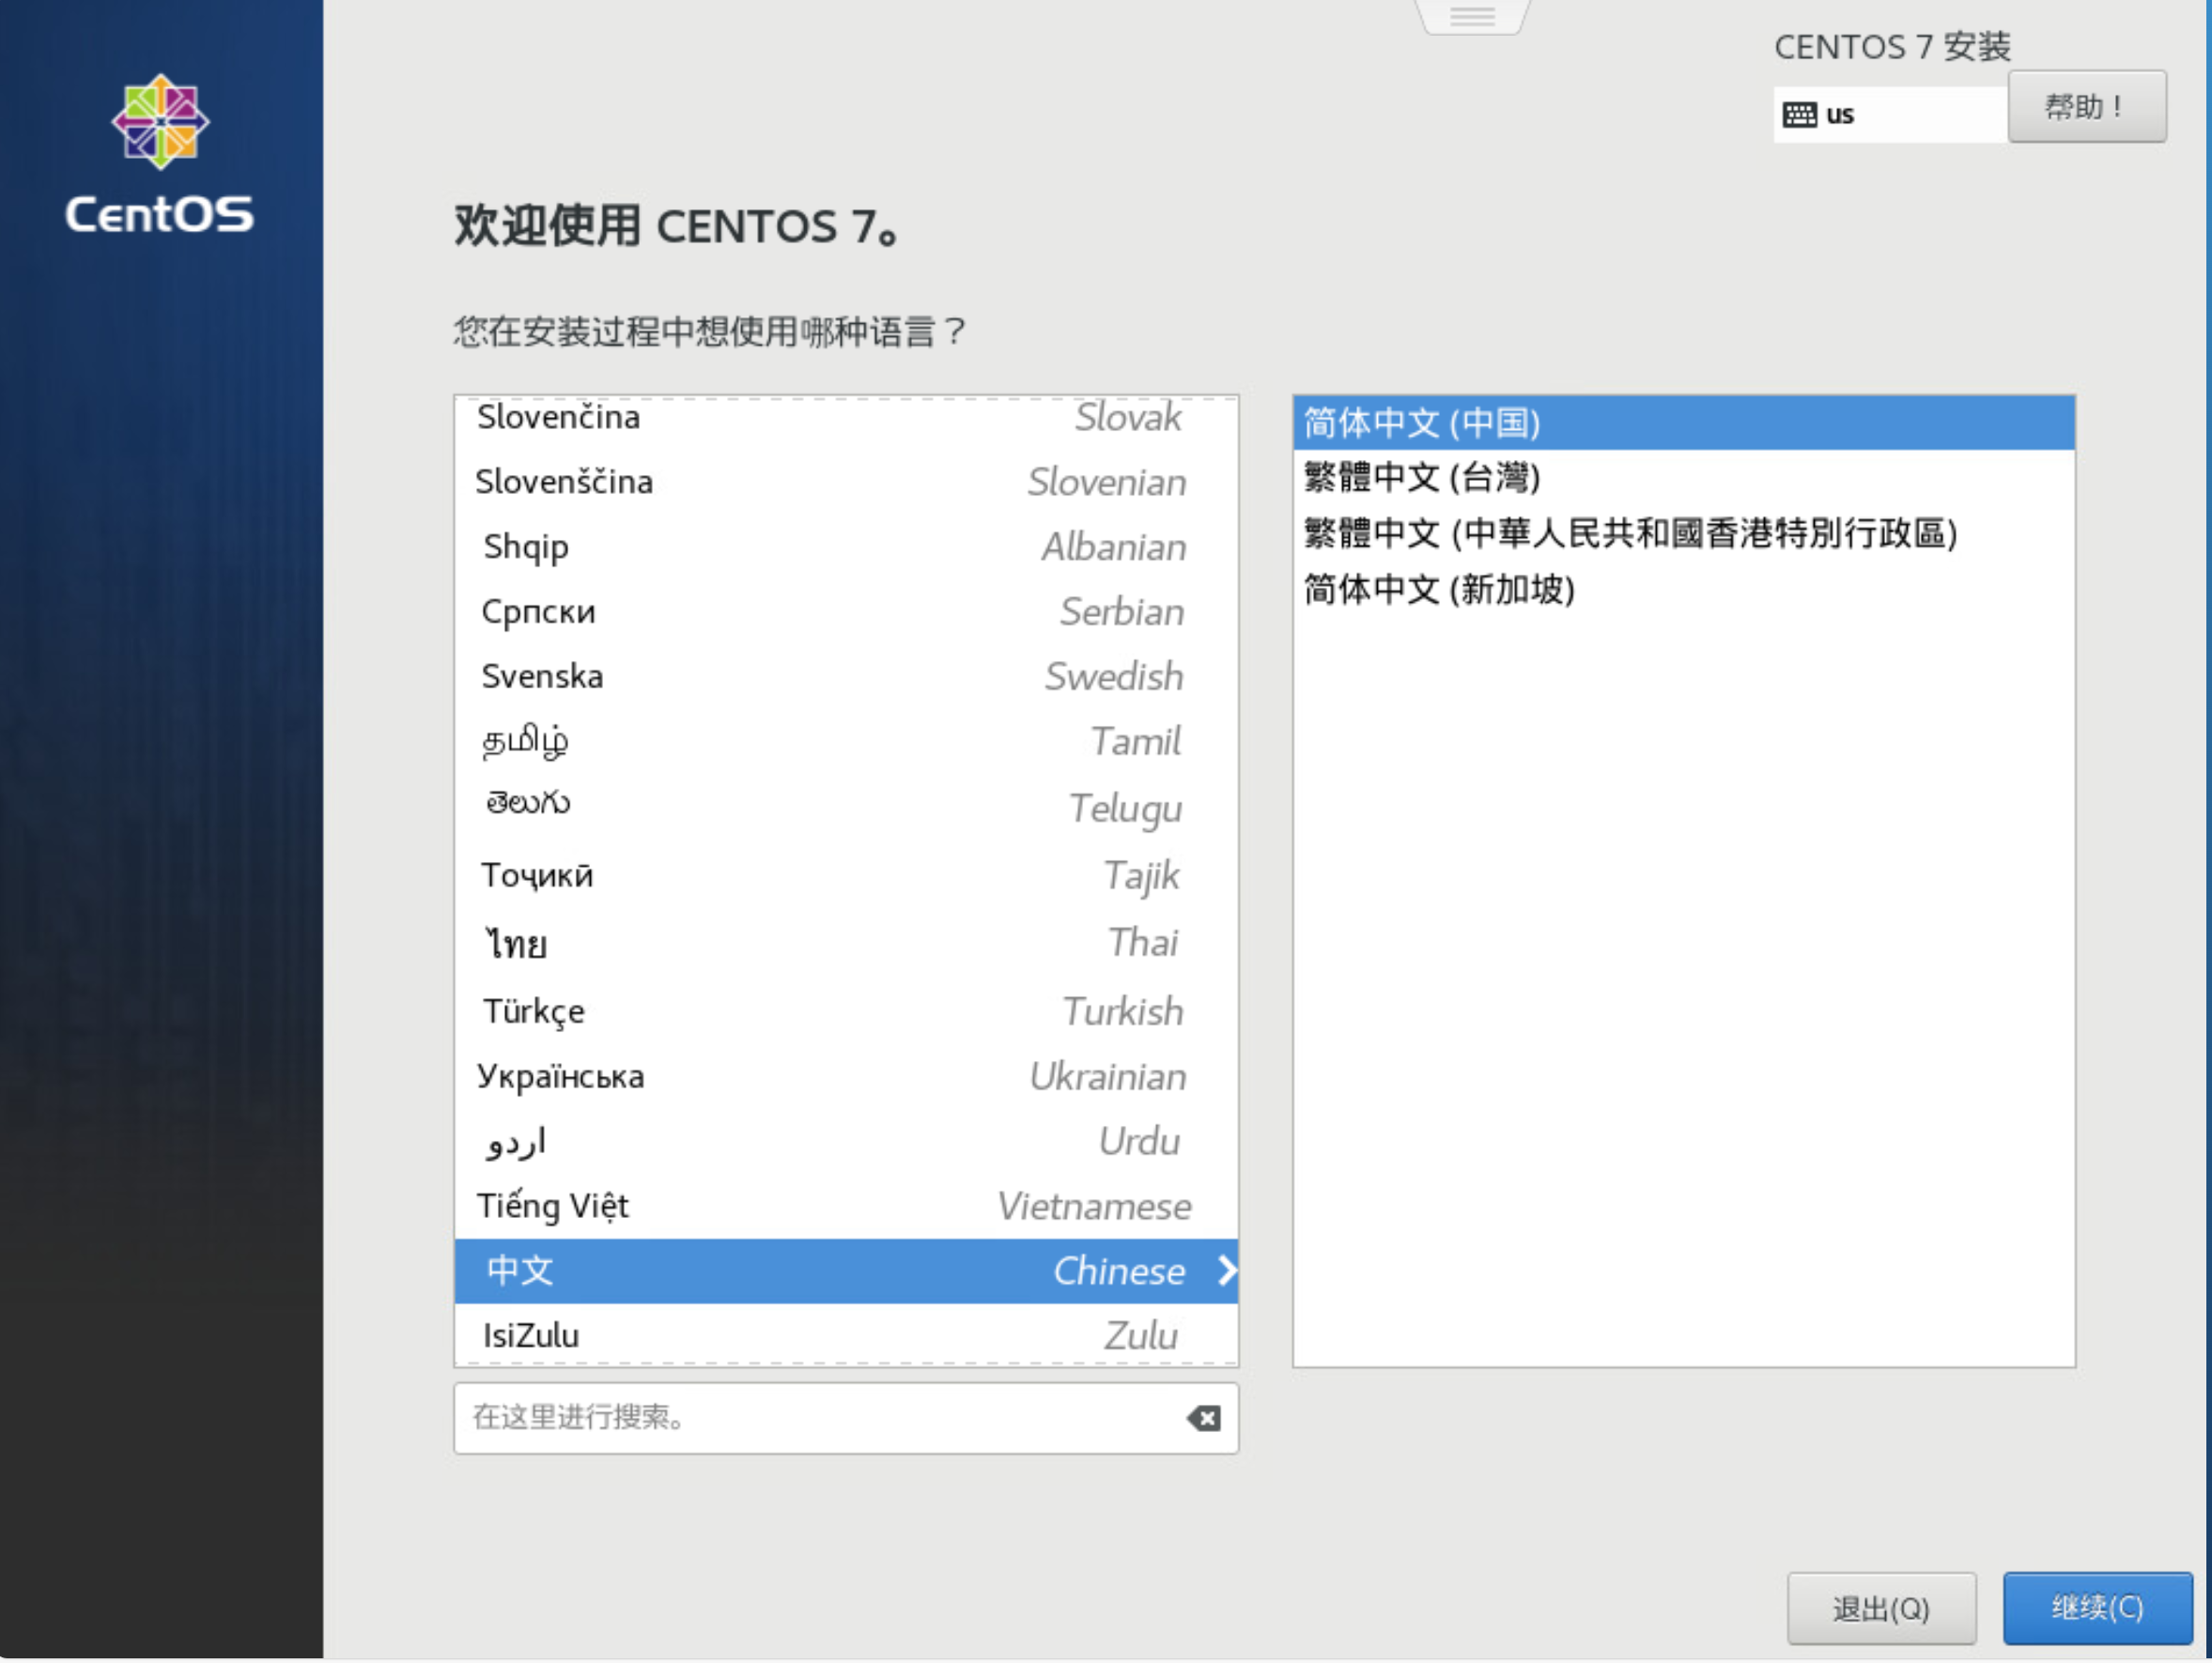
打开电源 ,启动后,选择控制台 新窗口打开控制台,完成系统安装及配置
进入系统安装引导页,按提示一步一步安装
- 注意: 分区配置步骤需要调整默认分区大小,否则默认分区基本都会不够用,需要重新调整根目录分区大小
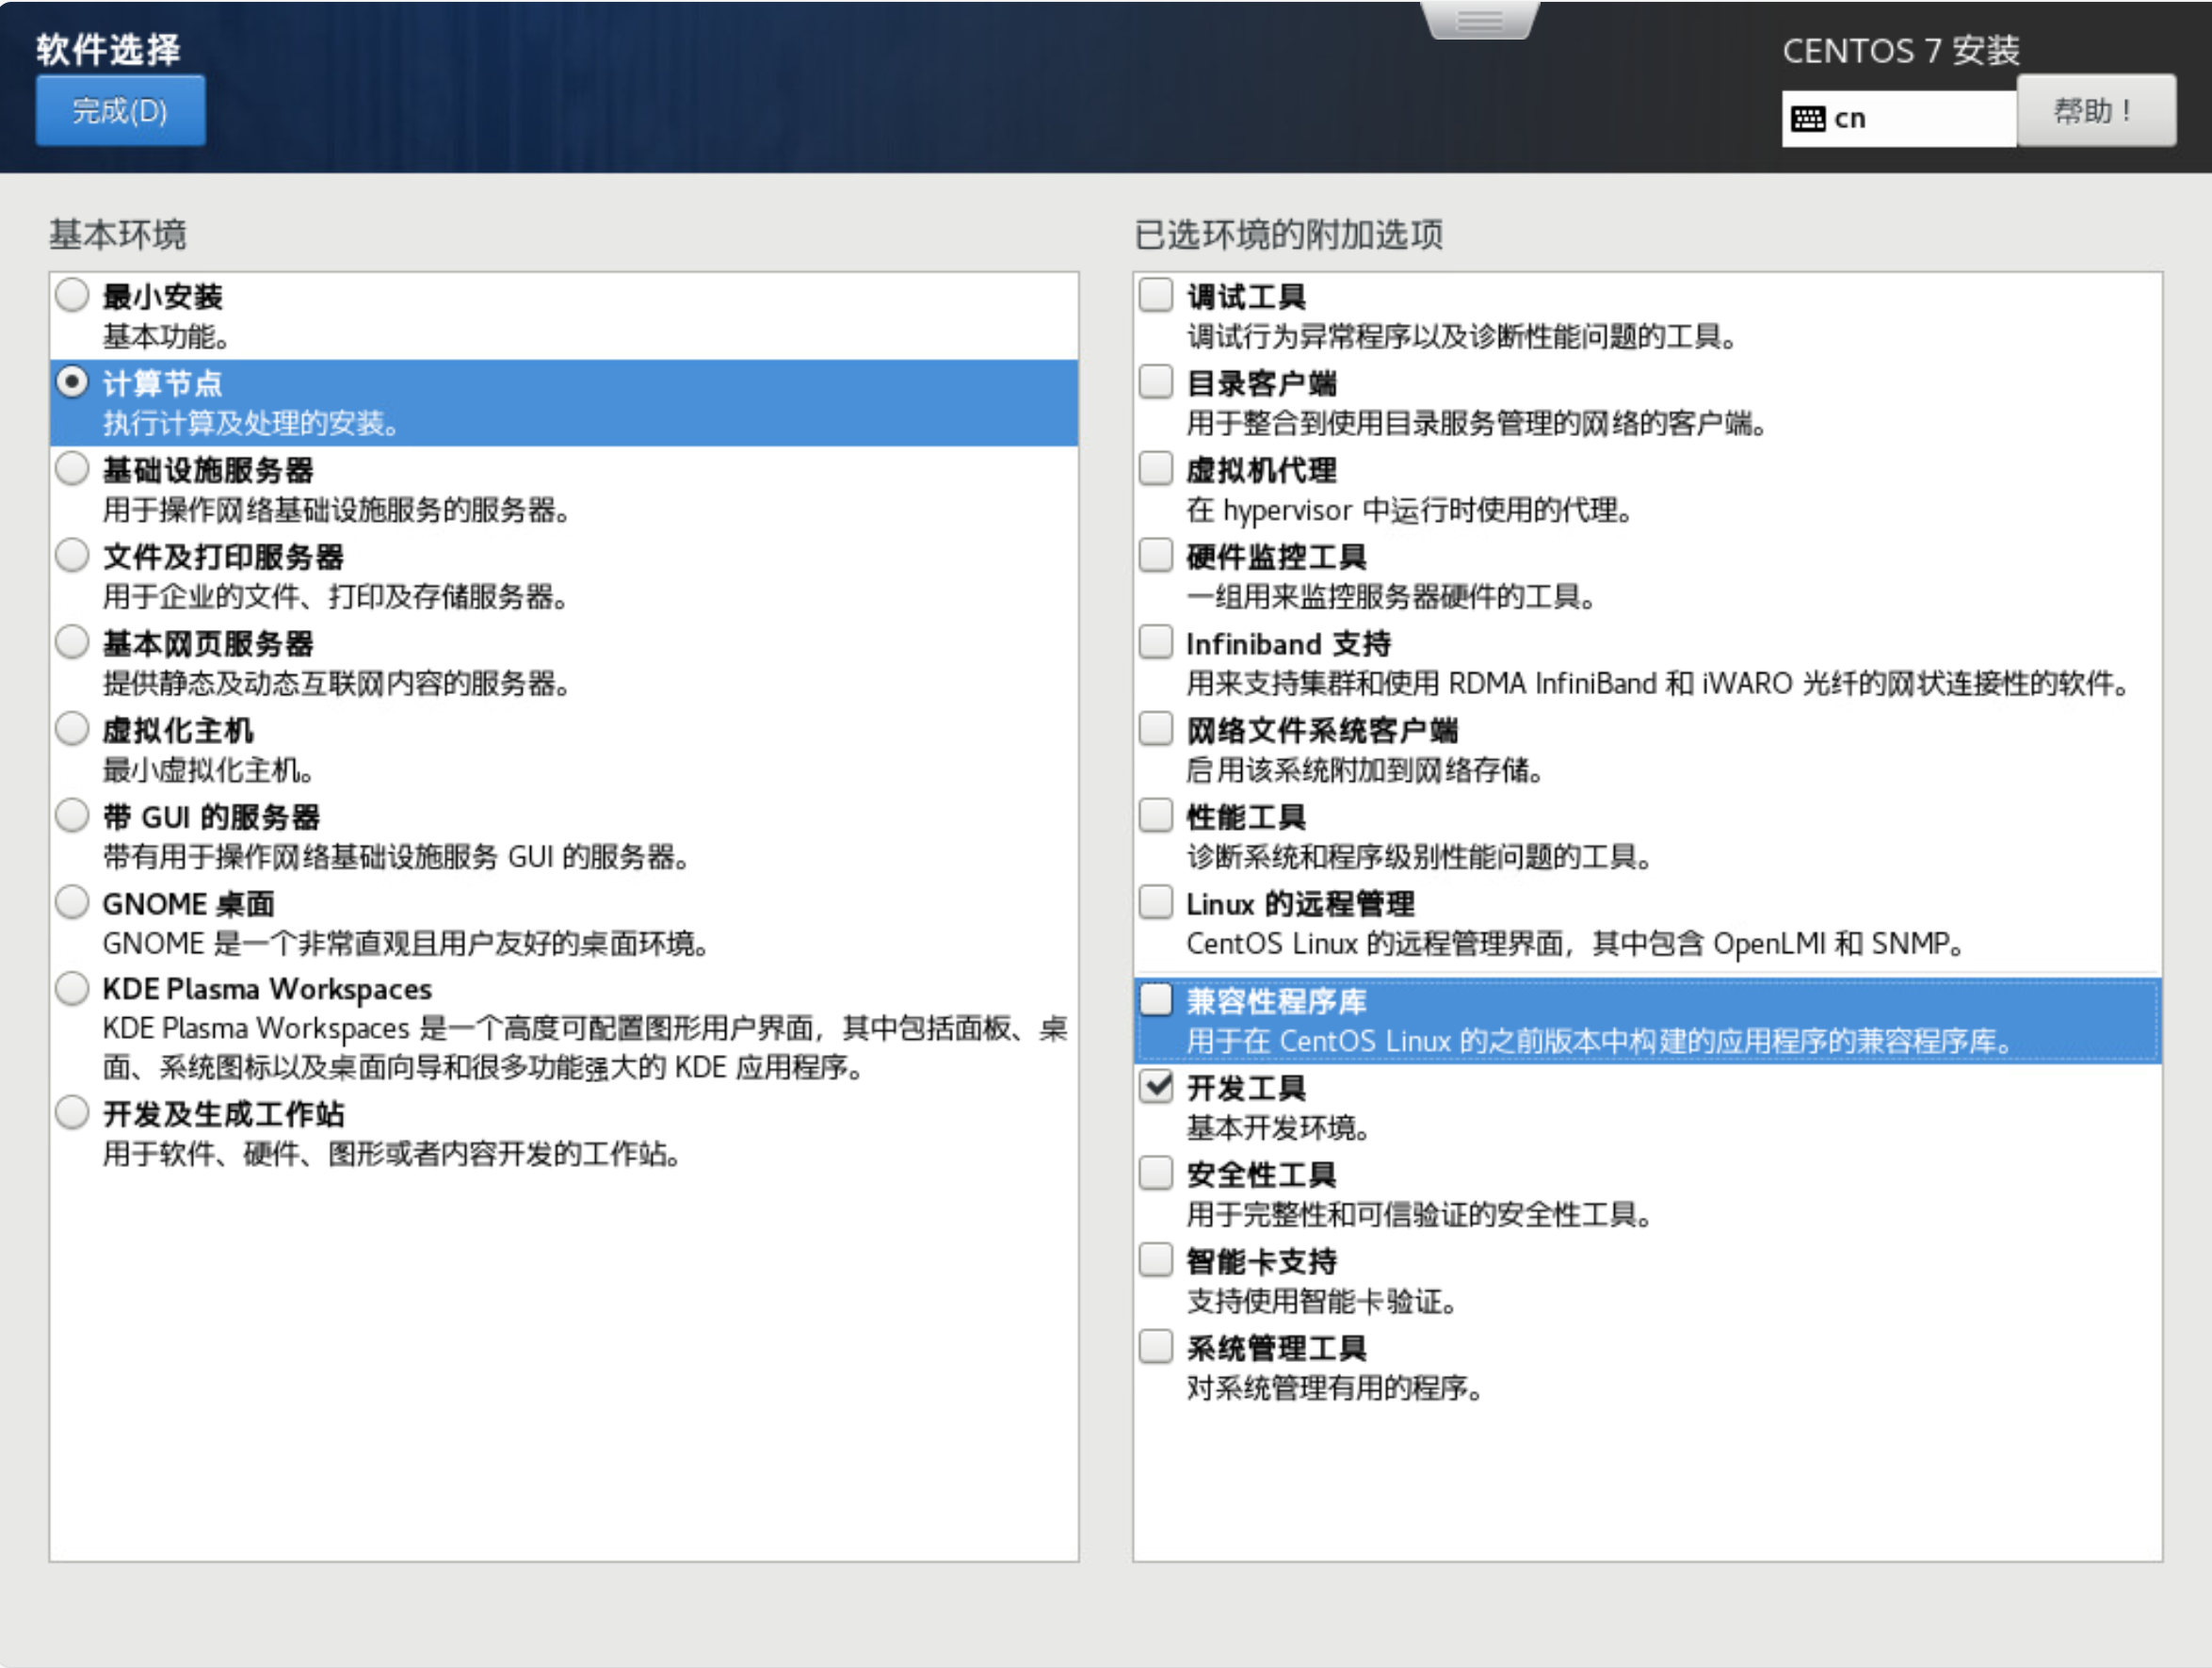
软件选择,勾选开发工具
设置ROOT 密码

等待安装完成, 点击重启, 等待系统启动后输入用户名密码 进入系统

系统初始化设置
此时系统无法访问网络,同时我们也无法通过ssh 访问服务器,需要继续使用vm 控制台完成以下初始化配置
设置静态IP
设置DNS服务器地址
设置主机名
yum换源
执行
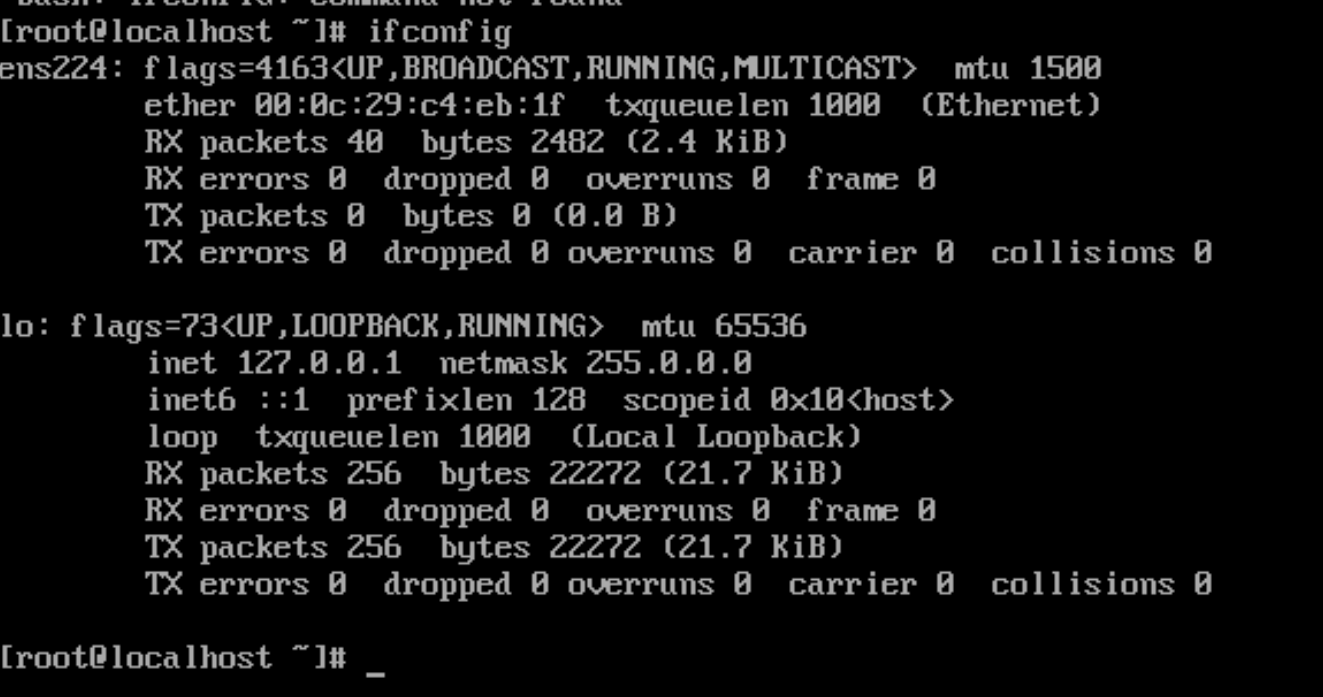
ifconfig命令,查看网卡名称图中网卡名为:ens224
编辑网卡对应配置文件 vi /etc/sysconfig/network-scripts/ifcfg-ens224 ,按i键进入编辑。编辑结束后Esc退出编辑,输入 :wq 保存退出

修改以下配置
注意KEY 全大写
1
2
3
4
5
6
7BOOTPROTO="static" # 使用静态IP地址,默认为dhcp 由DHCP 服务器动态分配
IPADDR="192.168.3.201" # 静态IP地址
NETMASK="255.255.255.0" # 子网掩码
GATEWAY="192.168.3.1" # 网关地址
DNS1="114.114.114.114" # DNS服务器
ONBOOT=yes #设置网卡启动方式开机自启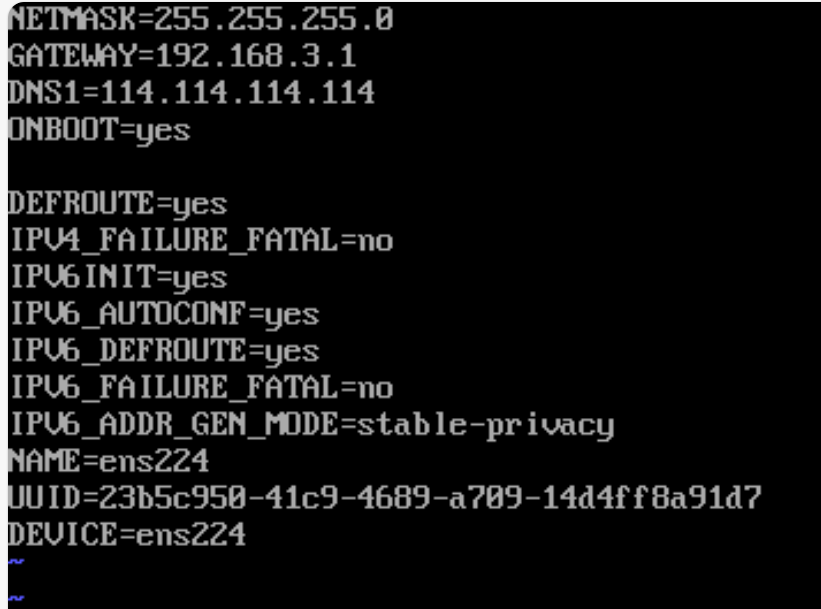
执行重启网络命令 , 重启后确认网络正常
1
2
3systemctl restart network
curl baidu.com
ifconfig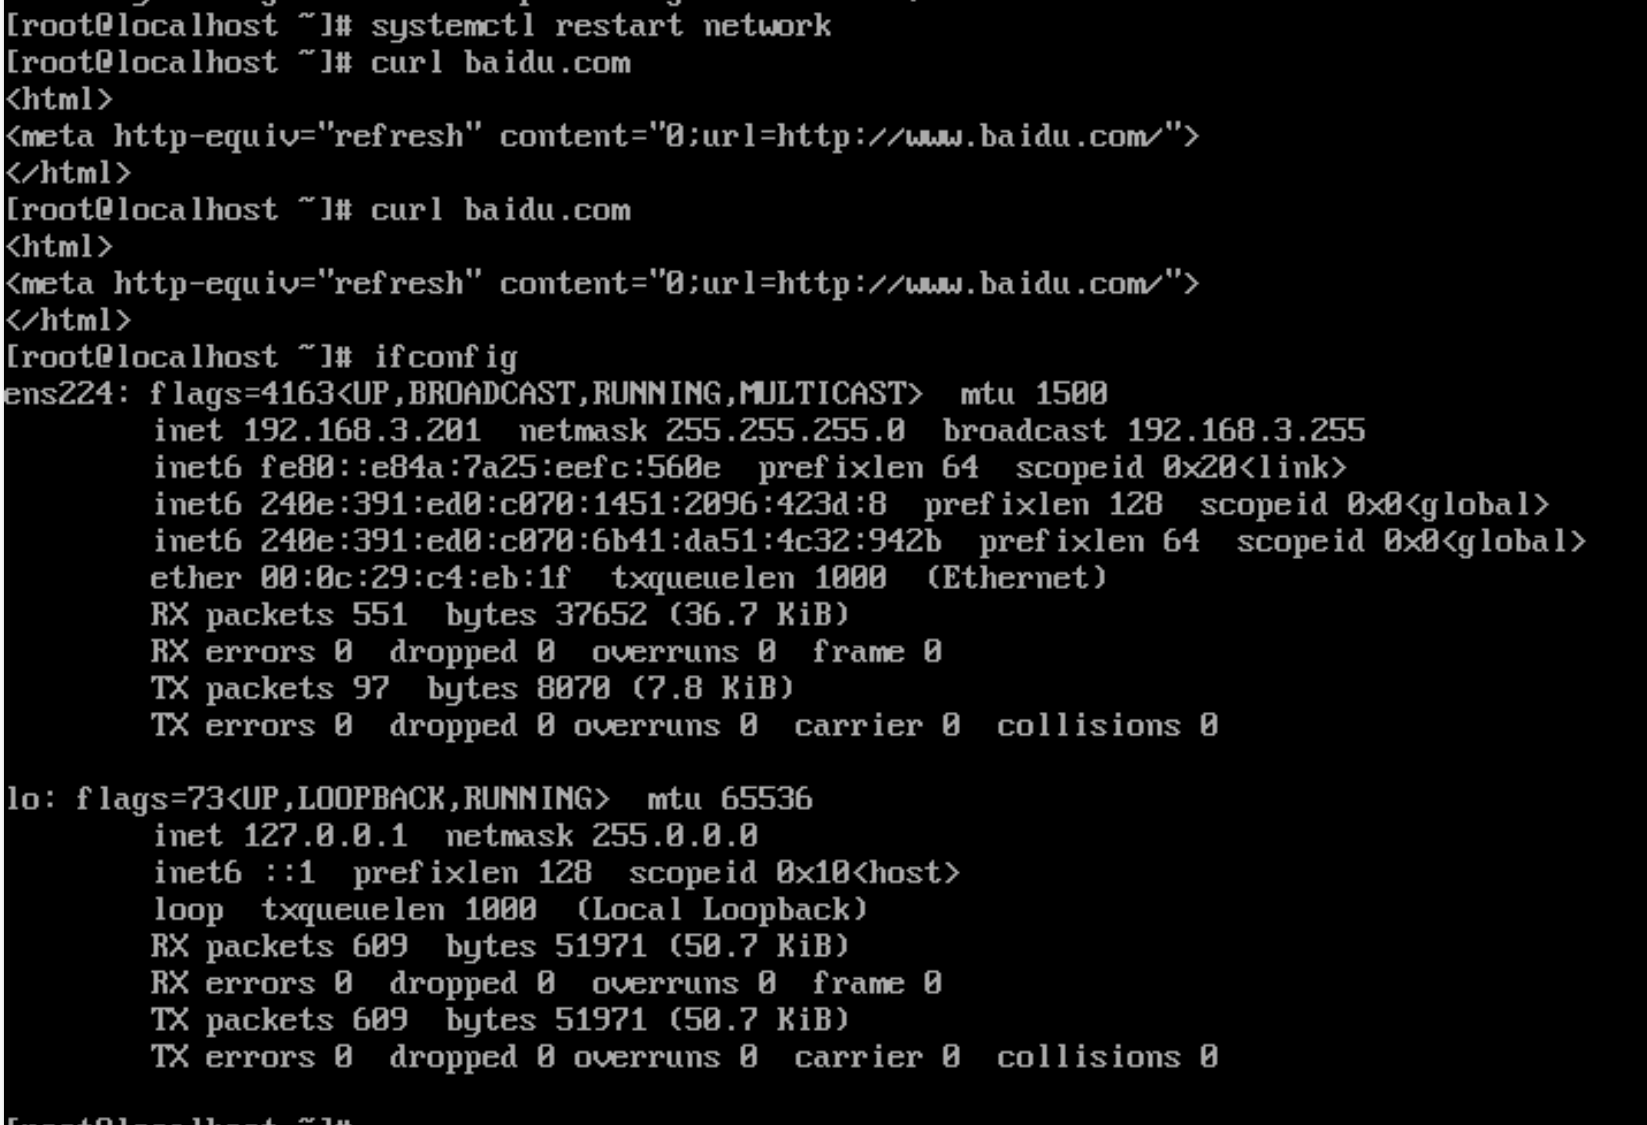
此时 ssh 连接也可正常使用, 可以关闭vm网页控制台,使用ssh 终端连接
此时防火墙未关闭,只能内网连接
执行hostnameset 命令修改主机名
1
hostnamectl set-hostname vm-centos-super-201
yum 换源
1
2
3
4
5
6
7
8
9
10
11
12# 备份配置
mv /etc/yum.repos.d/CentOS-Base.repo /etc/yum.repos.d/CentOS-Base.repo.backup
# 下载新的 CentOS-Base.repo 到 /etc/yum.repos.d/
wget -O /etc/yum.repos.d/CentOS-Base.repo http://mirrors.cloud.tencent.com/repo/centos7_base.repo
# 配置epel源
wget -O /etc/yum.repos.d/epel.repo http://mirrors.cloud.tencent.com/repo/epel-7.repo
# 清理缓存
yum clean all
# 生成缓存
yum makecache
# 更新软件包
yum update等待升级完成后,关闭防火墙 [按需,此处外层有路由器NAT 控制端口开放,因此关闭虚拟机防火墙]
1
2
systemctl stop firewalld.service
systemctl disable firewalld.service
k3s GPU 节点配置
WireGuard 组网 [可选]
关于如何安装WireGuard 及完成的配置生成及使用教程后续将单独提供详细教程, 此处仅仅简单介绍主要流程
安装wireguard
1 | yum install epel-release elrepo-release |
通过 wireguard.debug.icu 生成组网配置内容, 添加到 /etc/wireguard/ 目录下,执行以下命令快速创建网卡(假设生成的配置文件是wg1)
1 | wg-quick up wg1 |
使用curl 或 telnet 测试网络是否畅通 , 确认无误后,设置开启自启
k3s Agent 安装
此处笔者已有一个k3s集群,因此只安装agent 并添加到集群
因为我们已经基于WireGuard 组件好了虚拟局域网,集群的所有通信都是通过虚拟网络的,因此node ip ,node external ip 等都设置为在虚拟网络内的内网IP, 无需配置公网ip , —flannel-iface 设置为前文的配置的网卡名 wg1
1 | curl -sfL https://rancher-mirror.rancher.cn/k3s/k3s-install.sh | \ |
等待安装完成,即可在k3s 集群看到节点
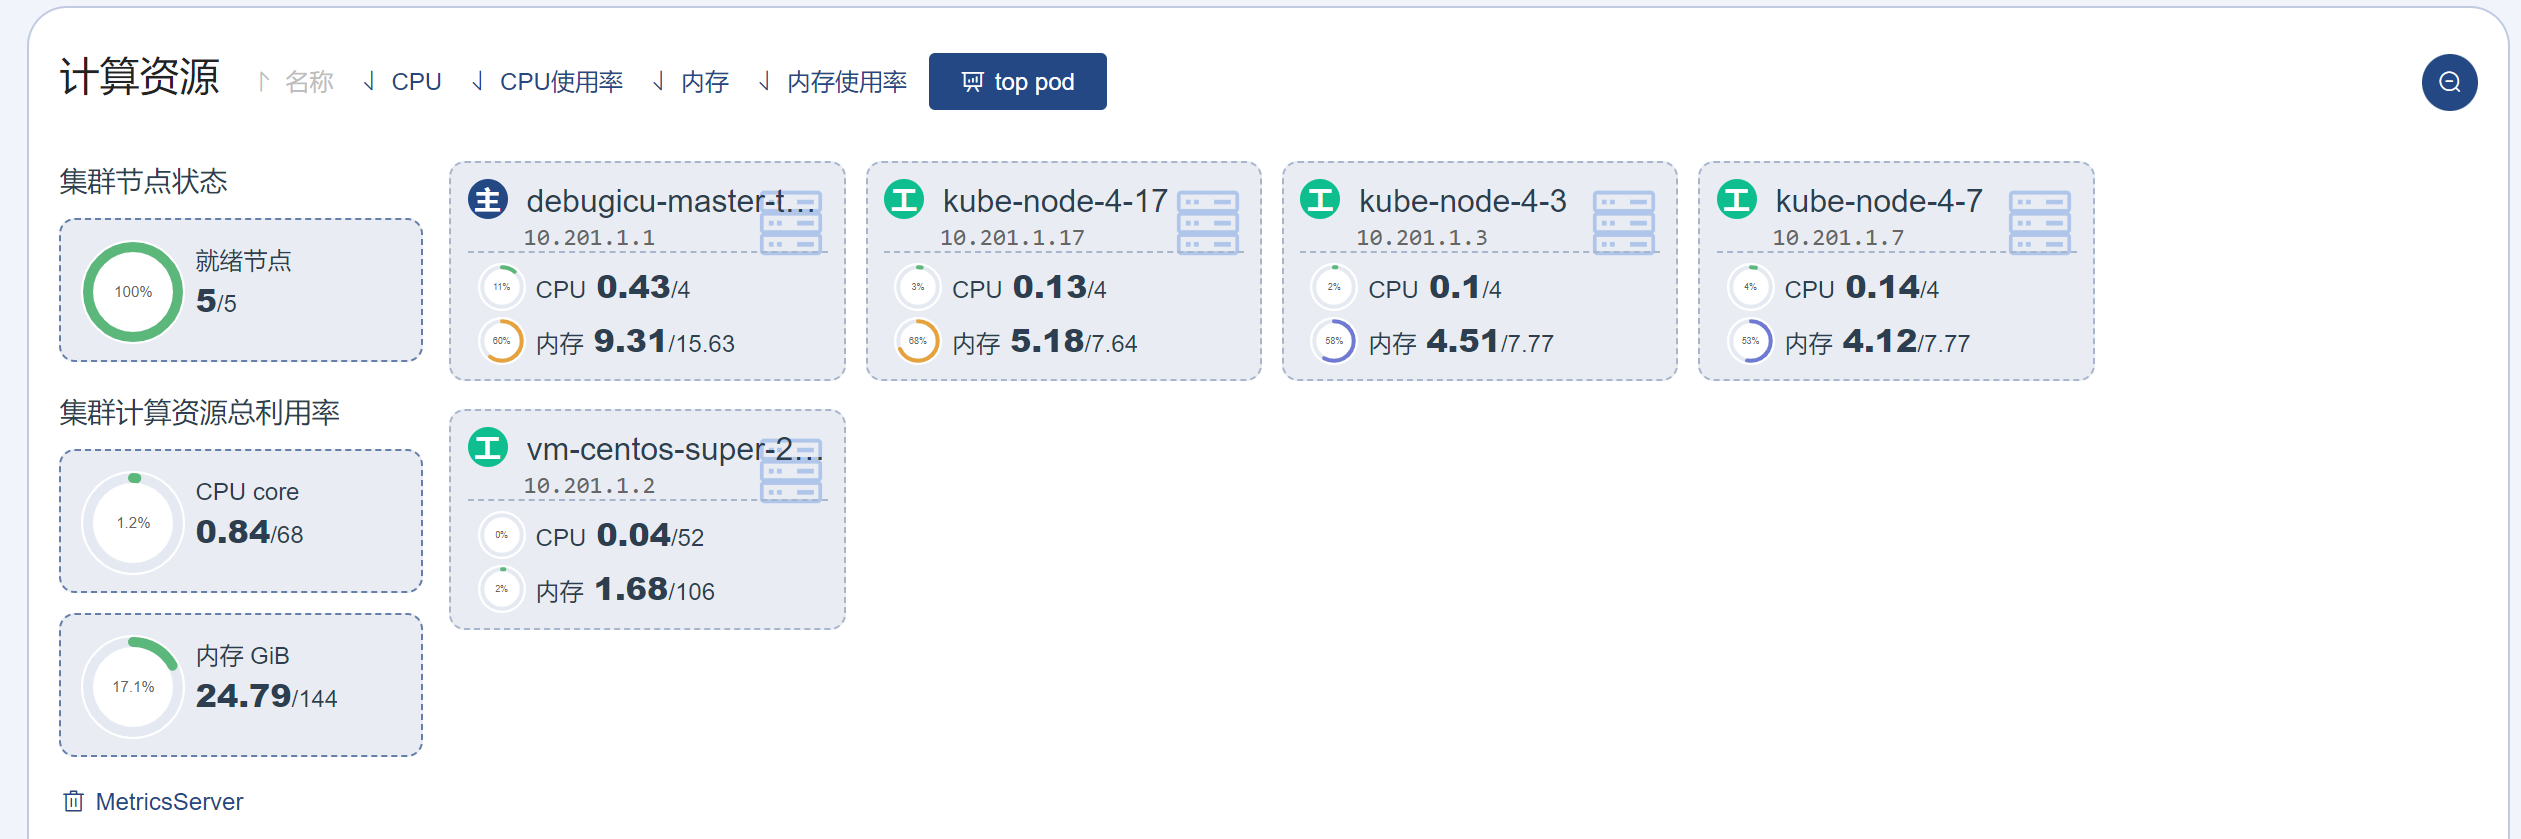
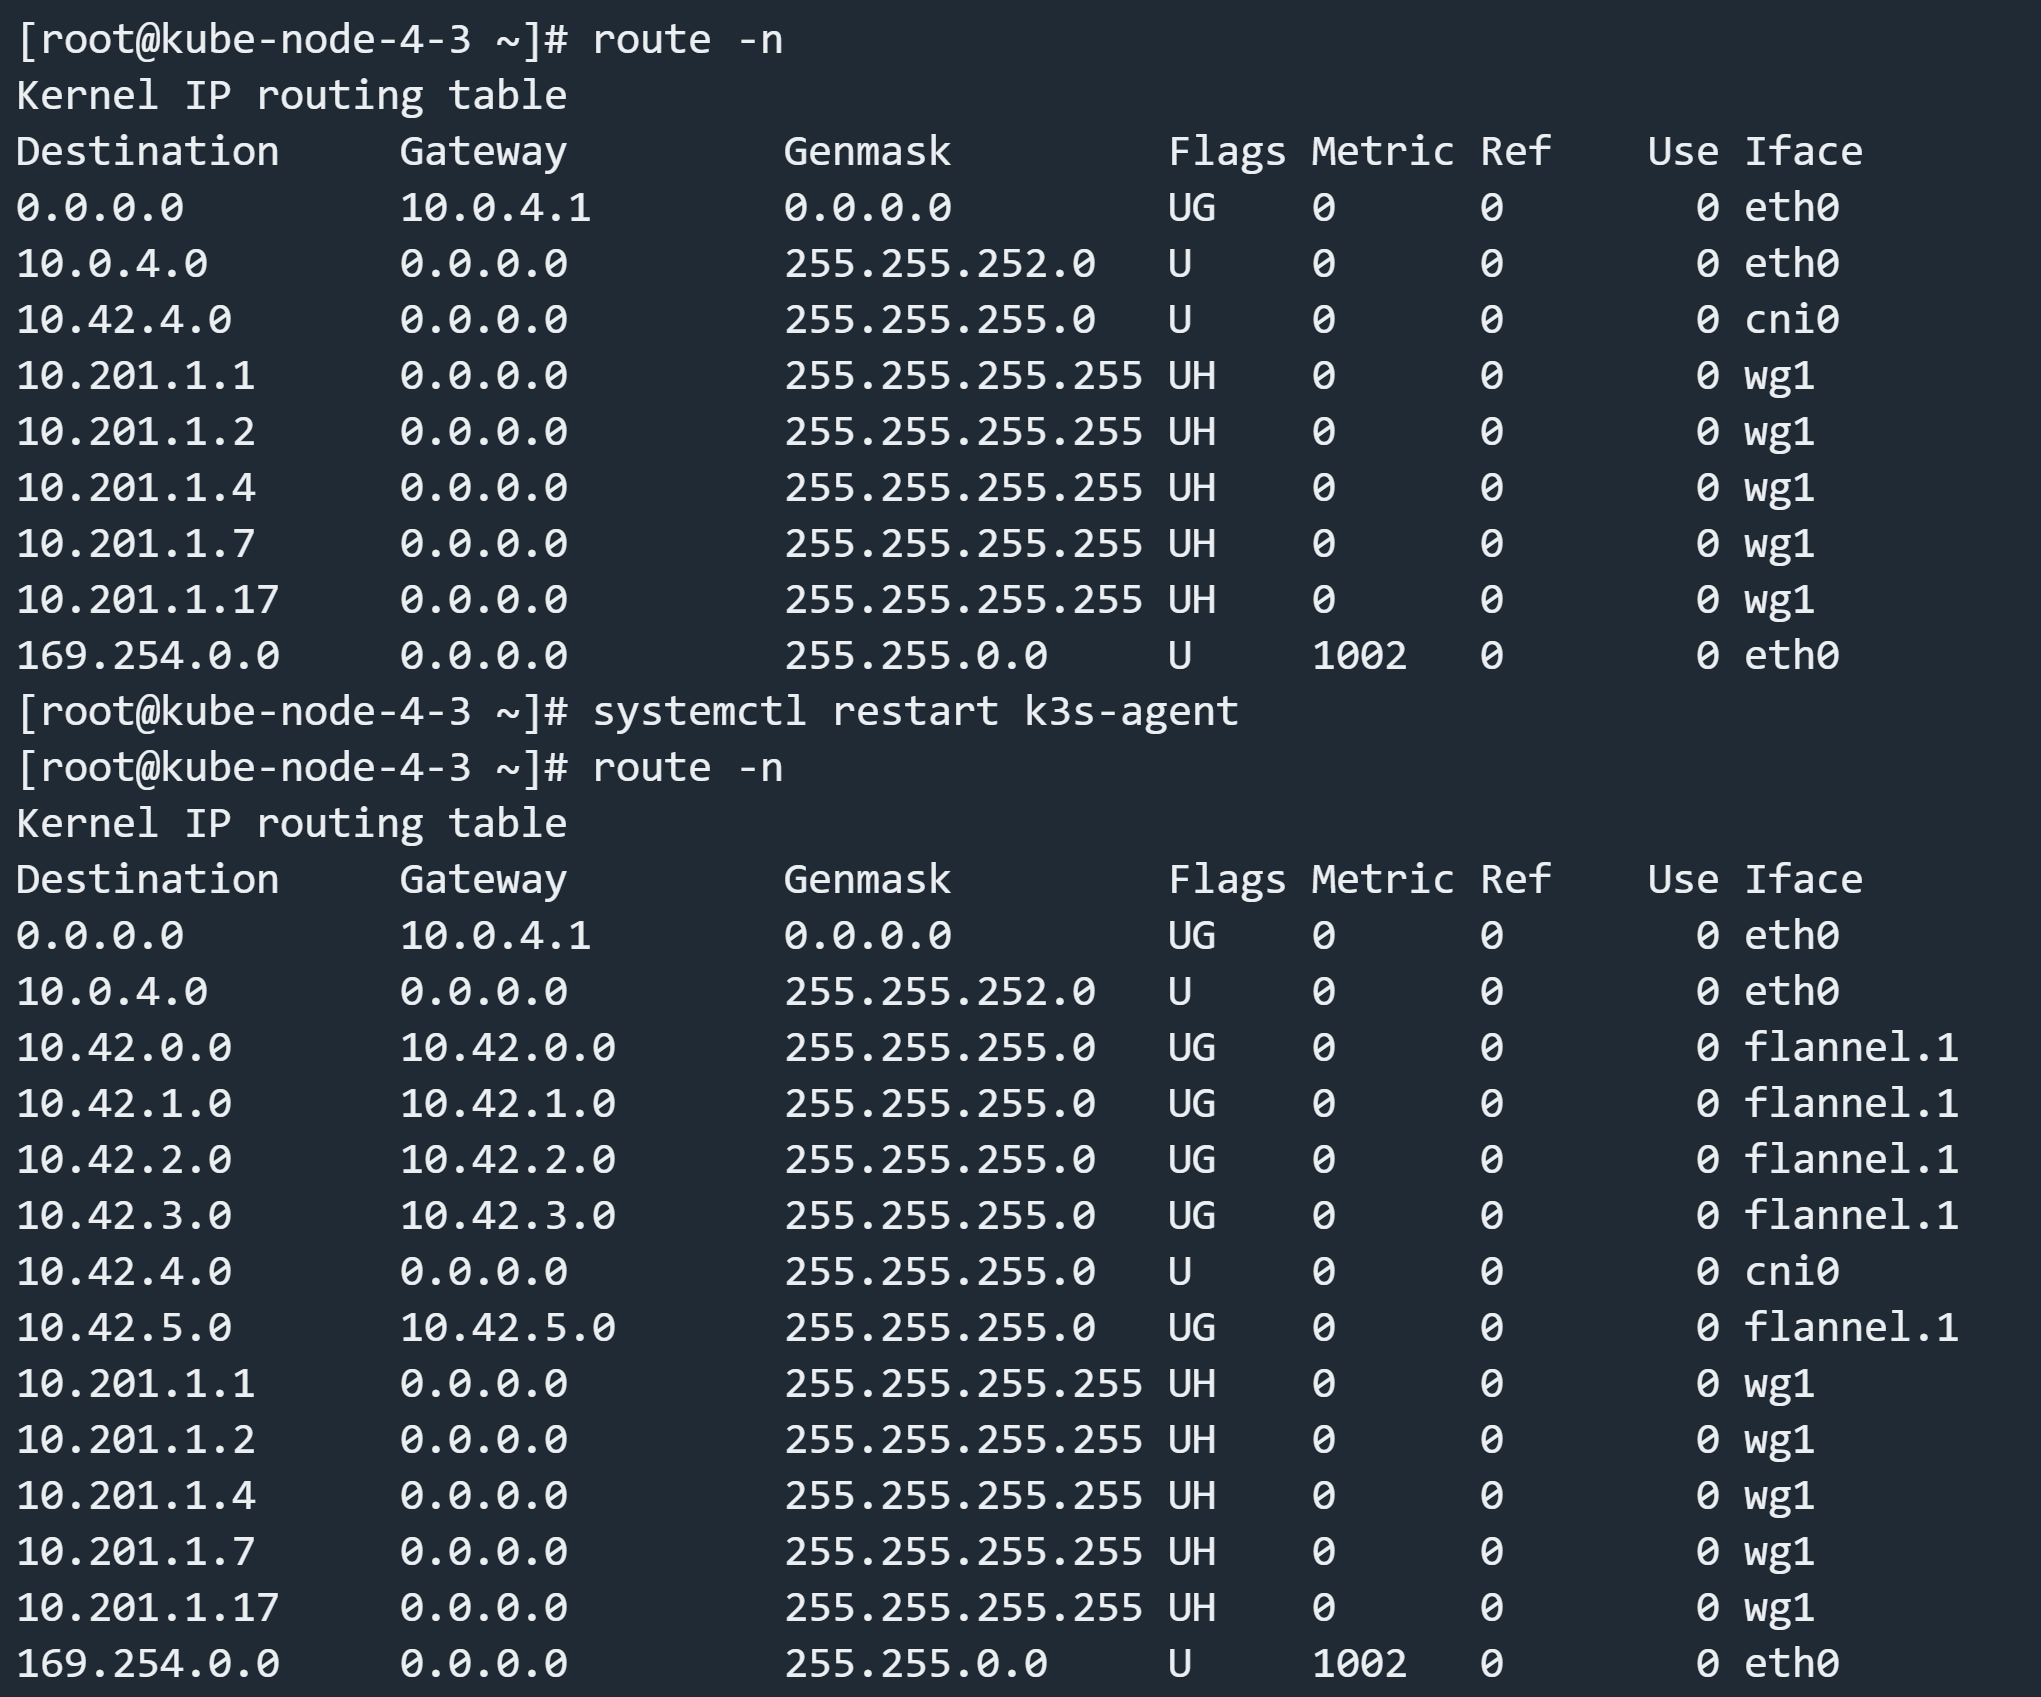
安装后,通过 route -n 查看各k3s 节点pod ip 路由是否正常, 正常情况,出虚拟组网的ip 路由外,还有10.42 开头的pod ip 路由, 如原有部分节点可能没有到新节点的路由,需要执行 systemctl restart k3s-agent 重启其他节点的k3s-agent (主节点可执行 systemctl restart k3s )
显卡驱动安装
下载显卡驱动
1 | wget https://us.download.nvidia.cn/tesla/525.147.05/NVIDIA-Linux-x86_64-525.147.05.run |
查看内核参数
1 | uname -r |
确认显卡正常识别
1 | lspci | grep NVIDIA |
执行安装命令
1 | ./NVIDIA-Linux-x86_64-525.147.05.run --kernel-source-path=/usr/src/kernels/$(uname -r) -k $(uname -r) |
首次安装可能会遇到报错:在安装 NVIDIA 驱动程序之前,必须禁用 Nouveau 驱动程序,以避免冲突。
1 | ERROR: The Nouveau kernel driver is currently in use by your system. This driver is incompatible with the NVIDIA driver, |
确认后,会有以下提示, 选择Yes, 让 nvidia-installer 尝试创建 modprobe 文件
1 | For some distributions, Nouveau can be disabled by adding a file in the modprobe configuration directory. Would you like |
然后出现如下提示:
1 | One or more modprobe configuration files to disable Nouveau have been written. For some distributions, this may be |
查看生成的配置文件:
1 | cat /etc/modprobe.d/nvidia-installer-disable-nouveau.conf |
对于Centos7 , nvidia-installer 创建的 modprobe 文件是可以正常禁用Nouveau驱动的,我们只需要重新生成initramfs镜像并重启系统即可
1 | # 备份当前的 initramfs 镜像文件 |
确认Nouveau 被正常禁用
1 | # 禁用前,禁用成功将没有任何输出 |
再次重启后,确认Nouveau被禁用后,重新执行驱动安装命令
1 | ./NVIDIA-Linux-x86_64-525.147.05.run --kernel-source-path=/usr/src/kernels/$(uname -r) -k $(uname -r) |
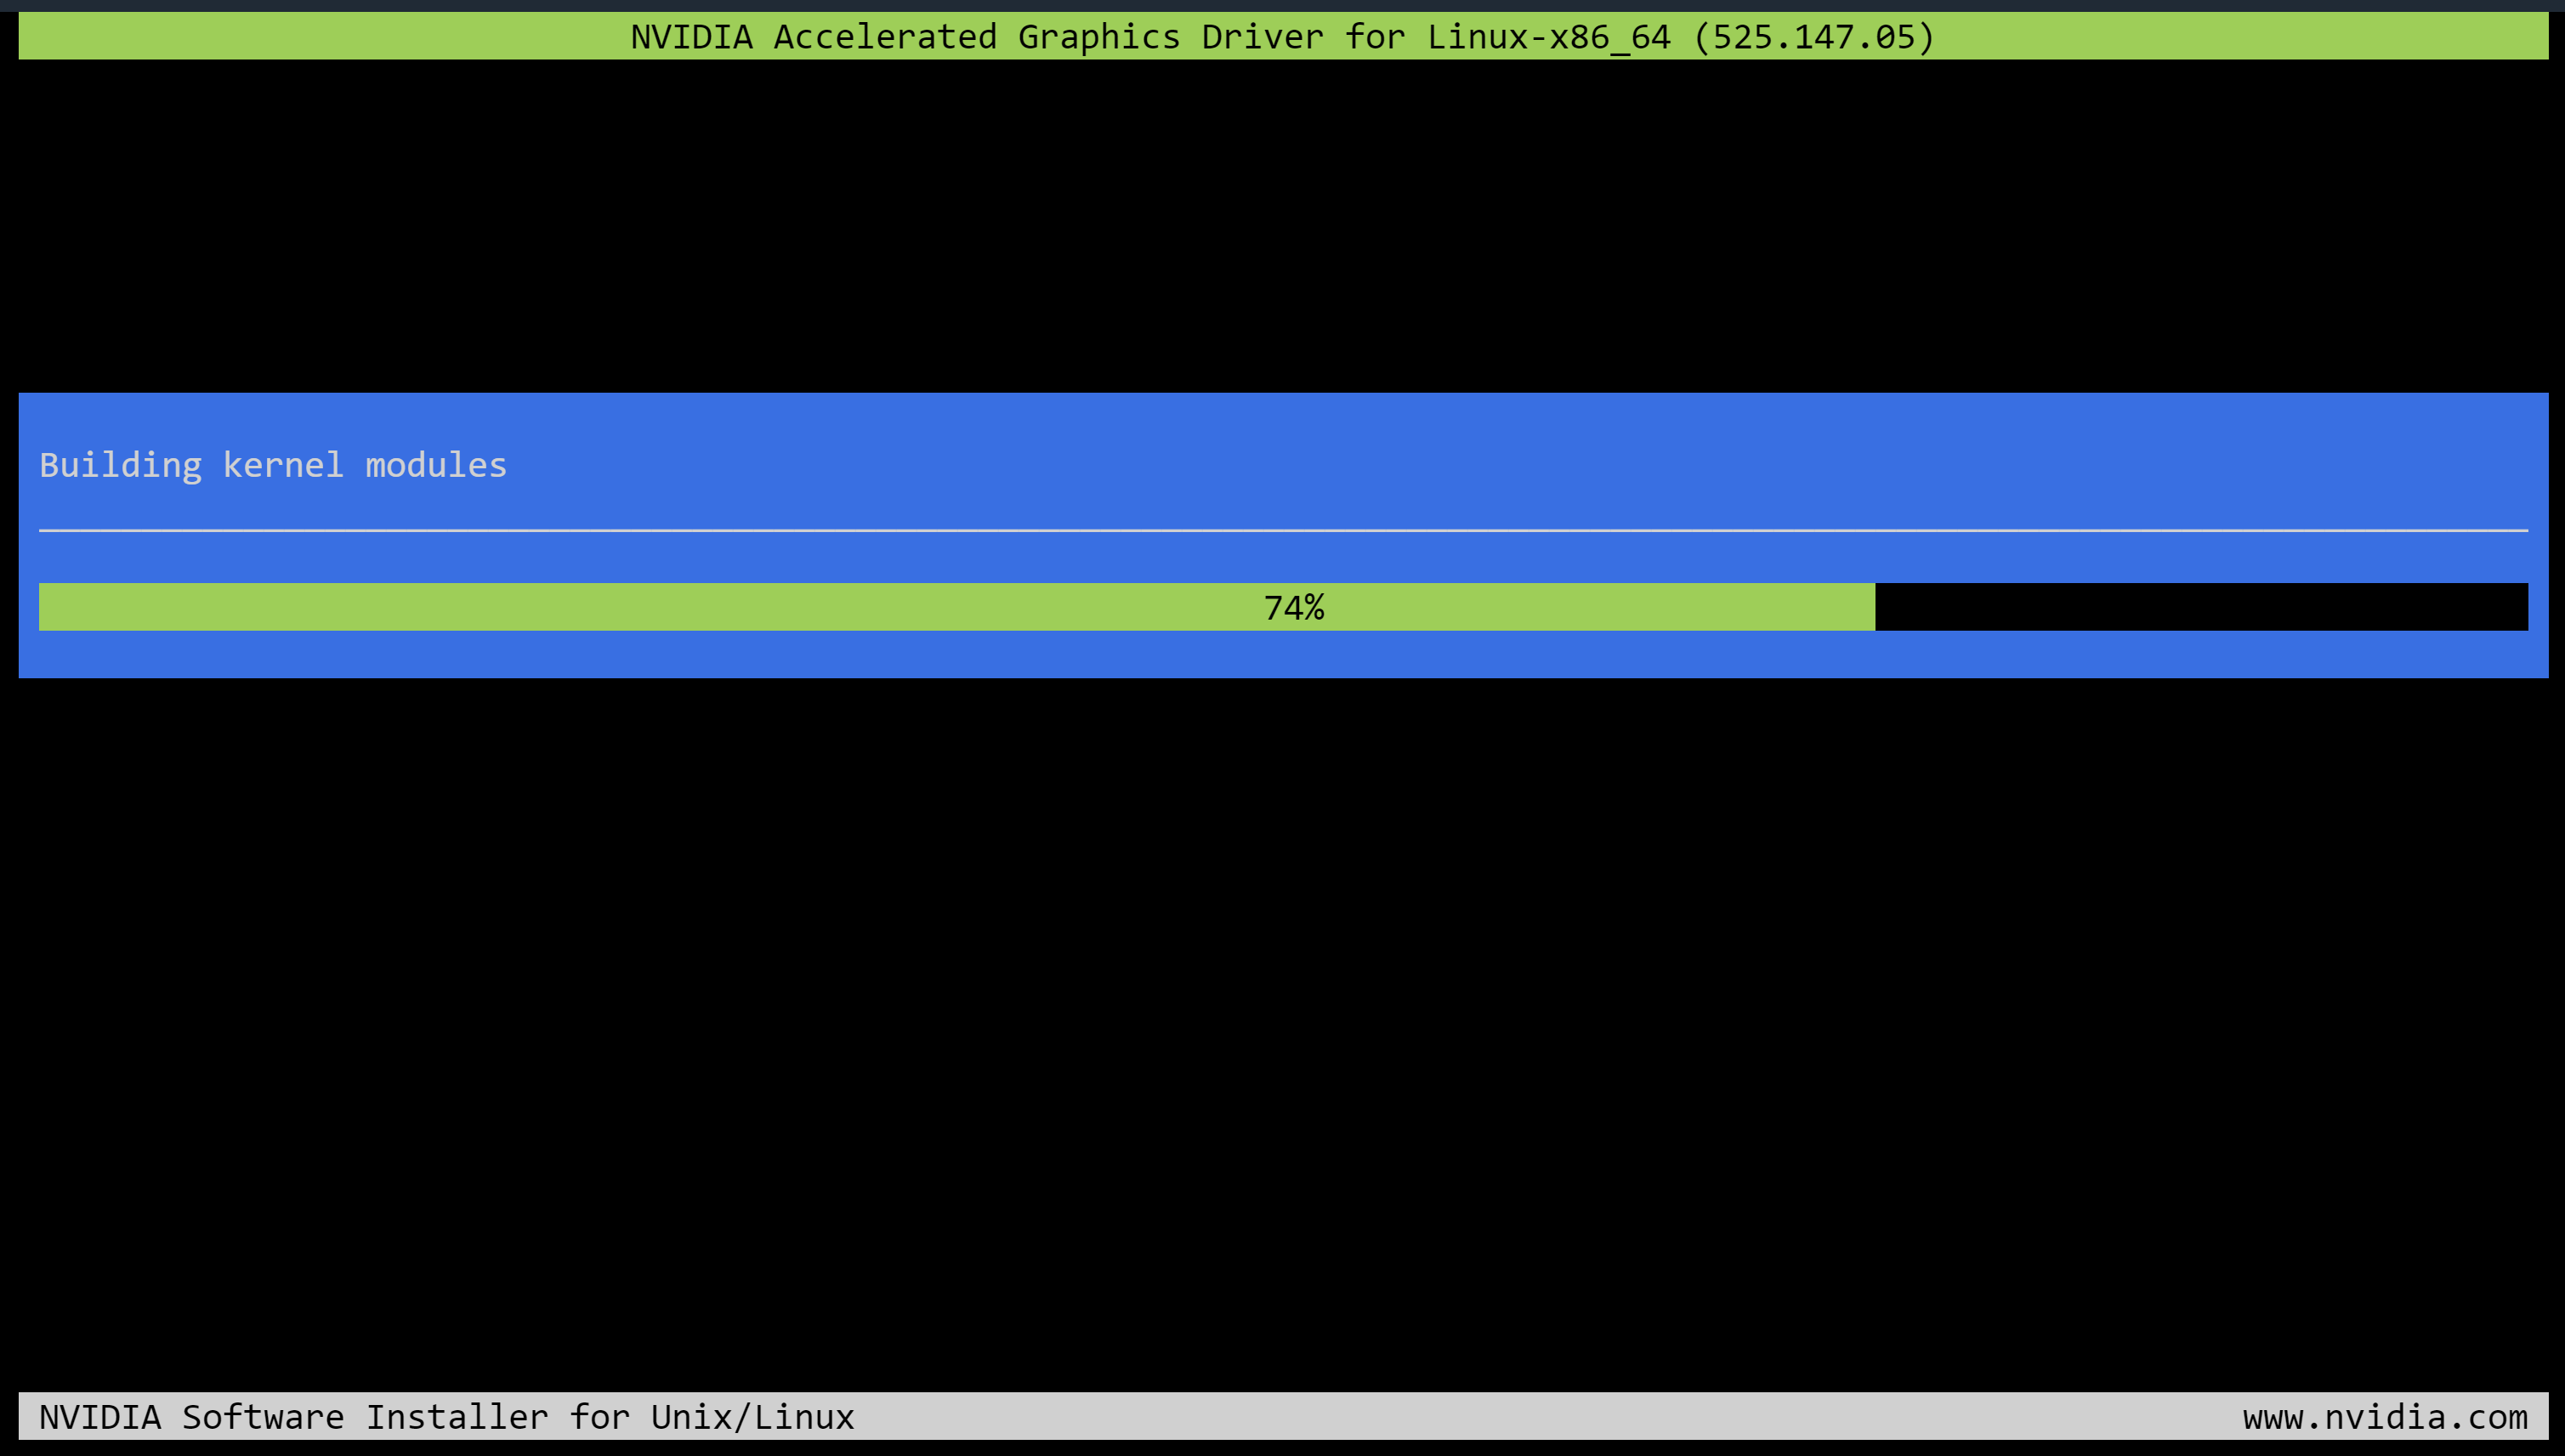
忽略下述提示,后续一路确认即可

执行nvidia-smi 确认驱动安装成功
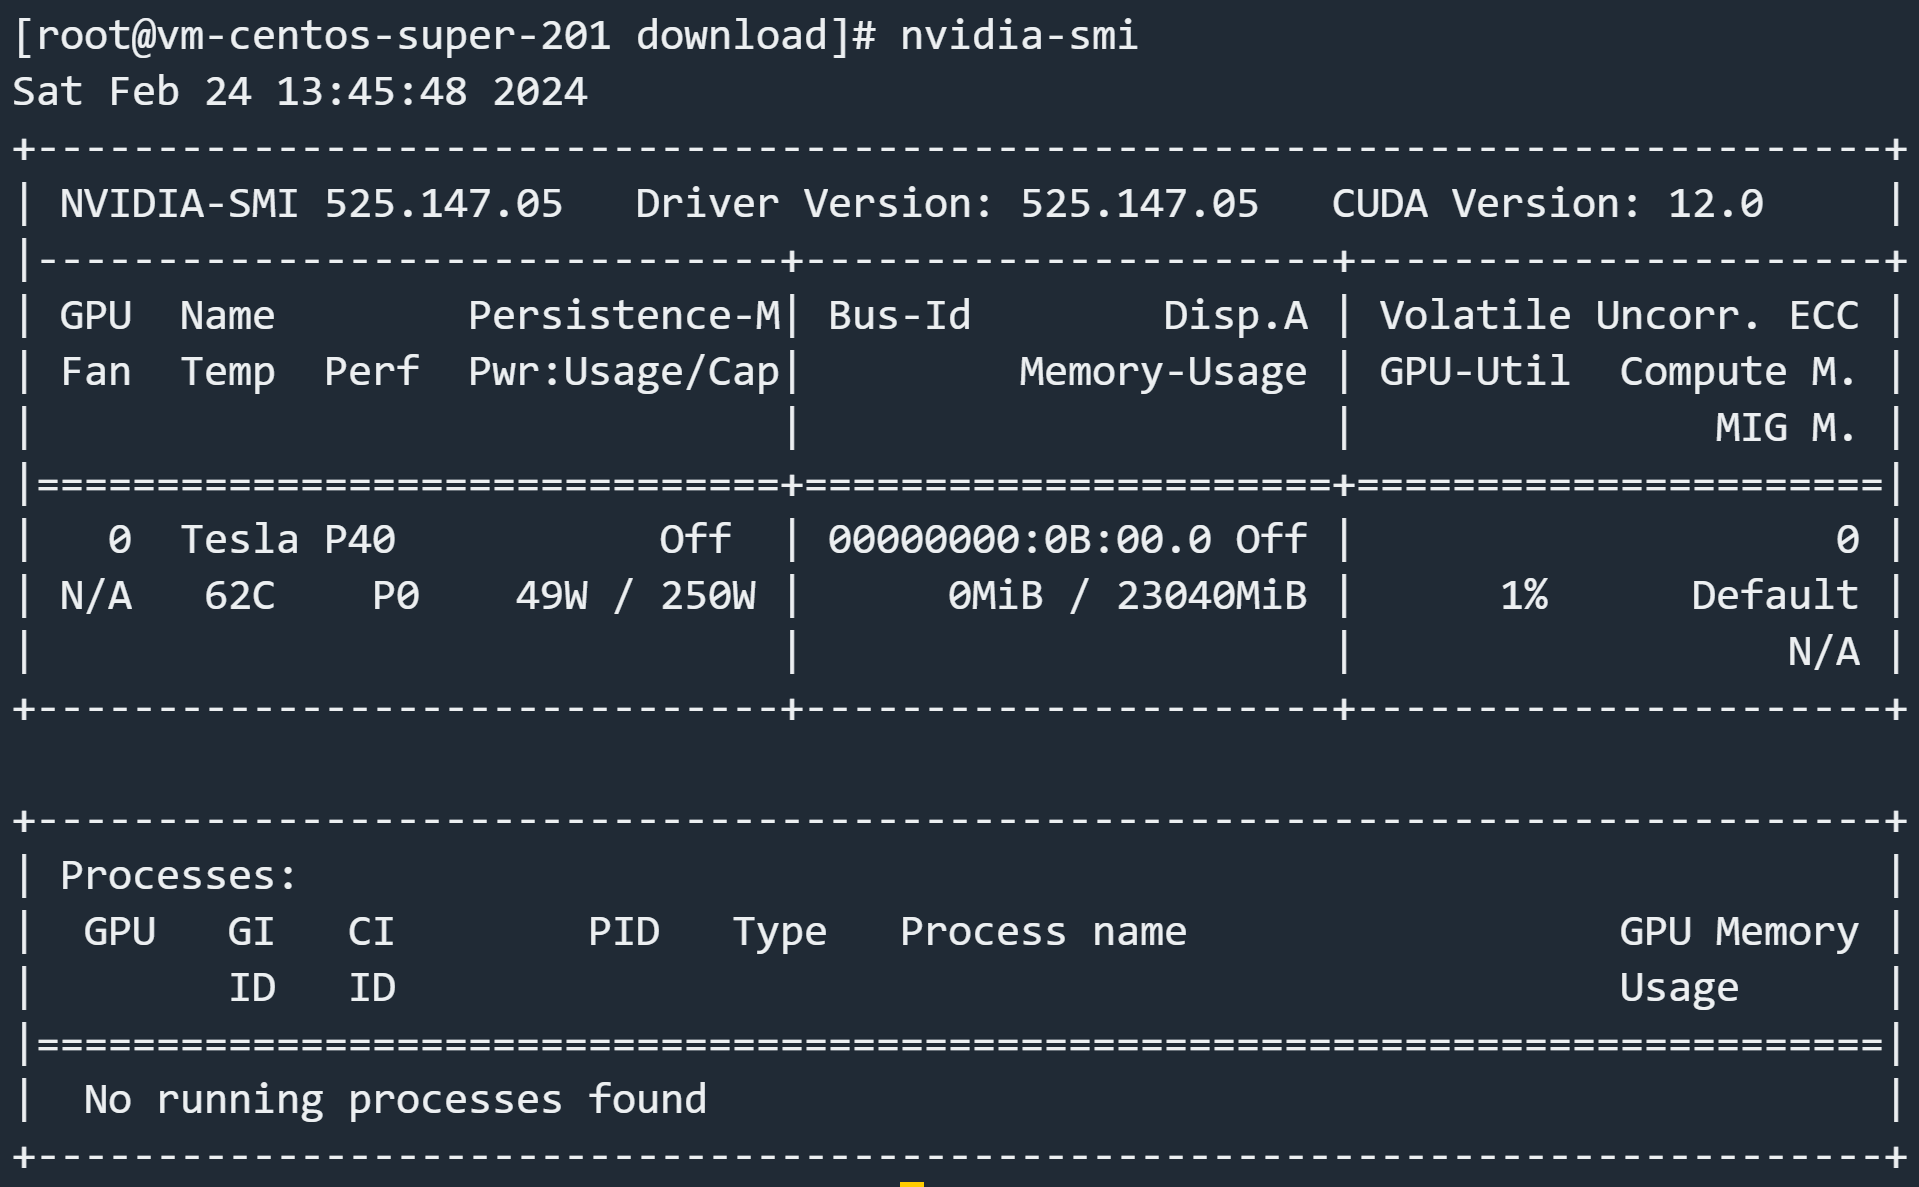
Nvidia 容器运行时配置
安装Docker ,配置Nvidia Runtime , 并修改k3s agent 的容器运行时为Nvidia docker runtime
设置Docker yum 源, 查看可用版本
1 | # 阿里国内镜像 |
选择一个版本并安装
1 | yum -y install docker-ce-25.0.3-1.el7 |

安装NVIDIA 容器工具包(nvidia-container-toolkit)
1 | # 配置yum 仓库 |

配置docker 国内源
1 | vim /etc/docker/daemon.json |
添加如下内容(也可使用其他公共源,或自建代理)
1 | { |
启动docker 并设置开机自启
1 | systemctl daemon-reload |
验证Docker 中可正常使用nvidia 显卡
1 | docker run --rm --gpus all nvidia/cuda:11.0.3-devel-ubuntu20.04 nvidia-smi |
接下来为k3s配置NVIDIA 容器运行时支持,因为k3s在启动时,会自动检测NVIDIA容器运行时是否存在,因此我们只需要执行以下命令重启即可
1 | curl -sfL https://rancher-mirror.rancher.cn/k3s/k3s-install.sh | sh - |
完成后确认nvidia 运行时配置正常
1 | grep nvidia /var/lib/rancher/k3s/agent/etc/containerd/config.toml |
安装
在k3s 上启动GPU pod
1 | kubectl logs -f nbody-gpu-benchmark |
本来到这里,核心操作均已完成,但是由于安装Centos时,没有调整默认分区配置,导致根目录只有50G ,下载大模型镜像时因为磁盘空间不足退出了,因此还需要调整下磁盘分区
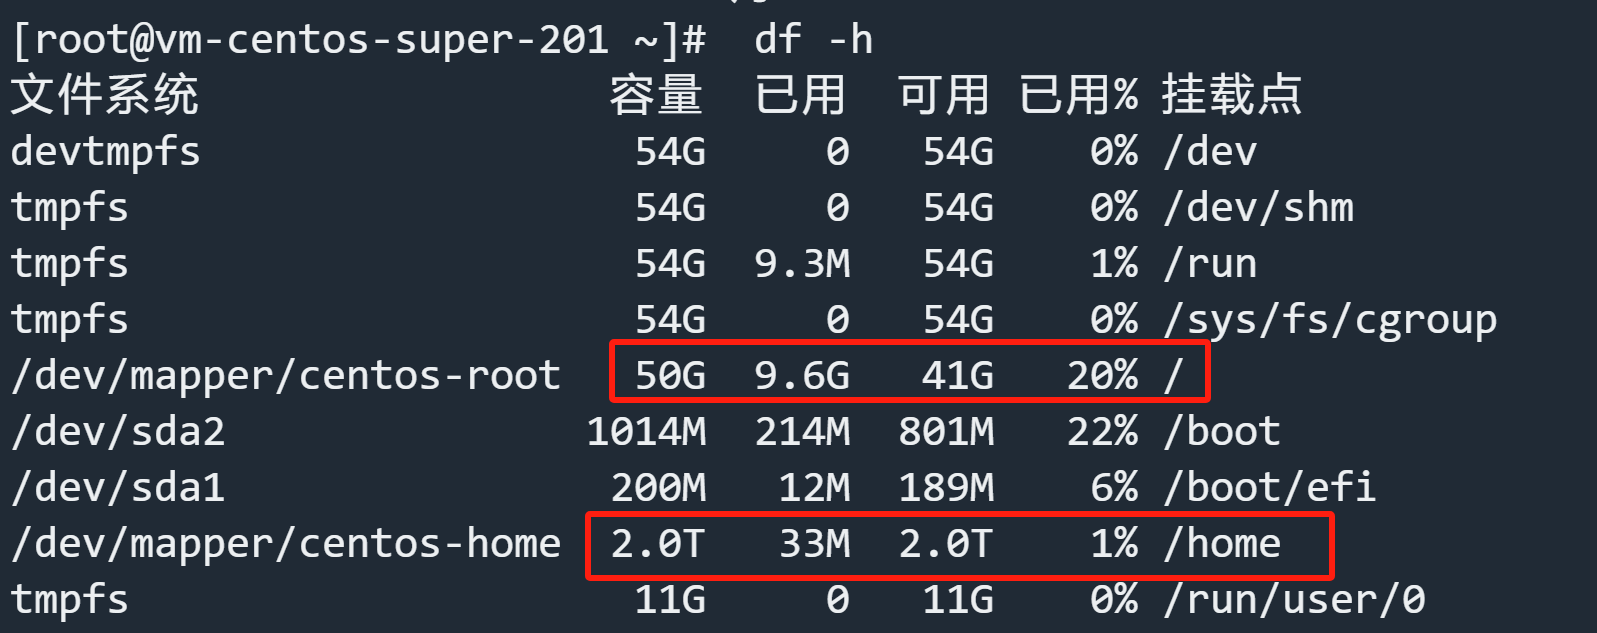
如果/home 分区下有文件,先备份所有文件 ,然后执行以下命令,对root分区进行扩容
1 | # 安装fuser命令 |

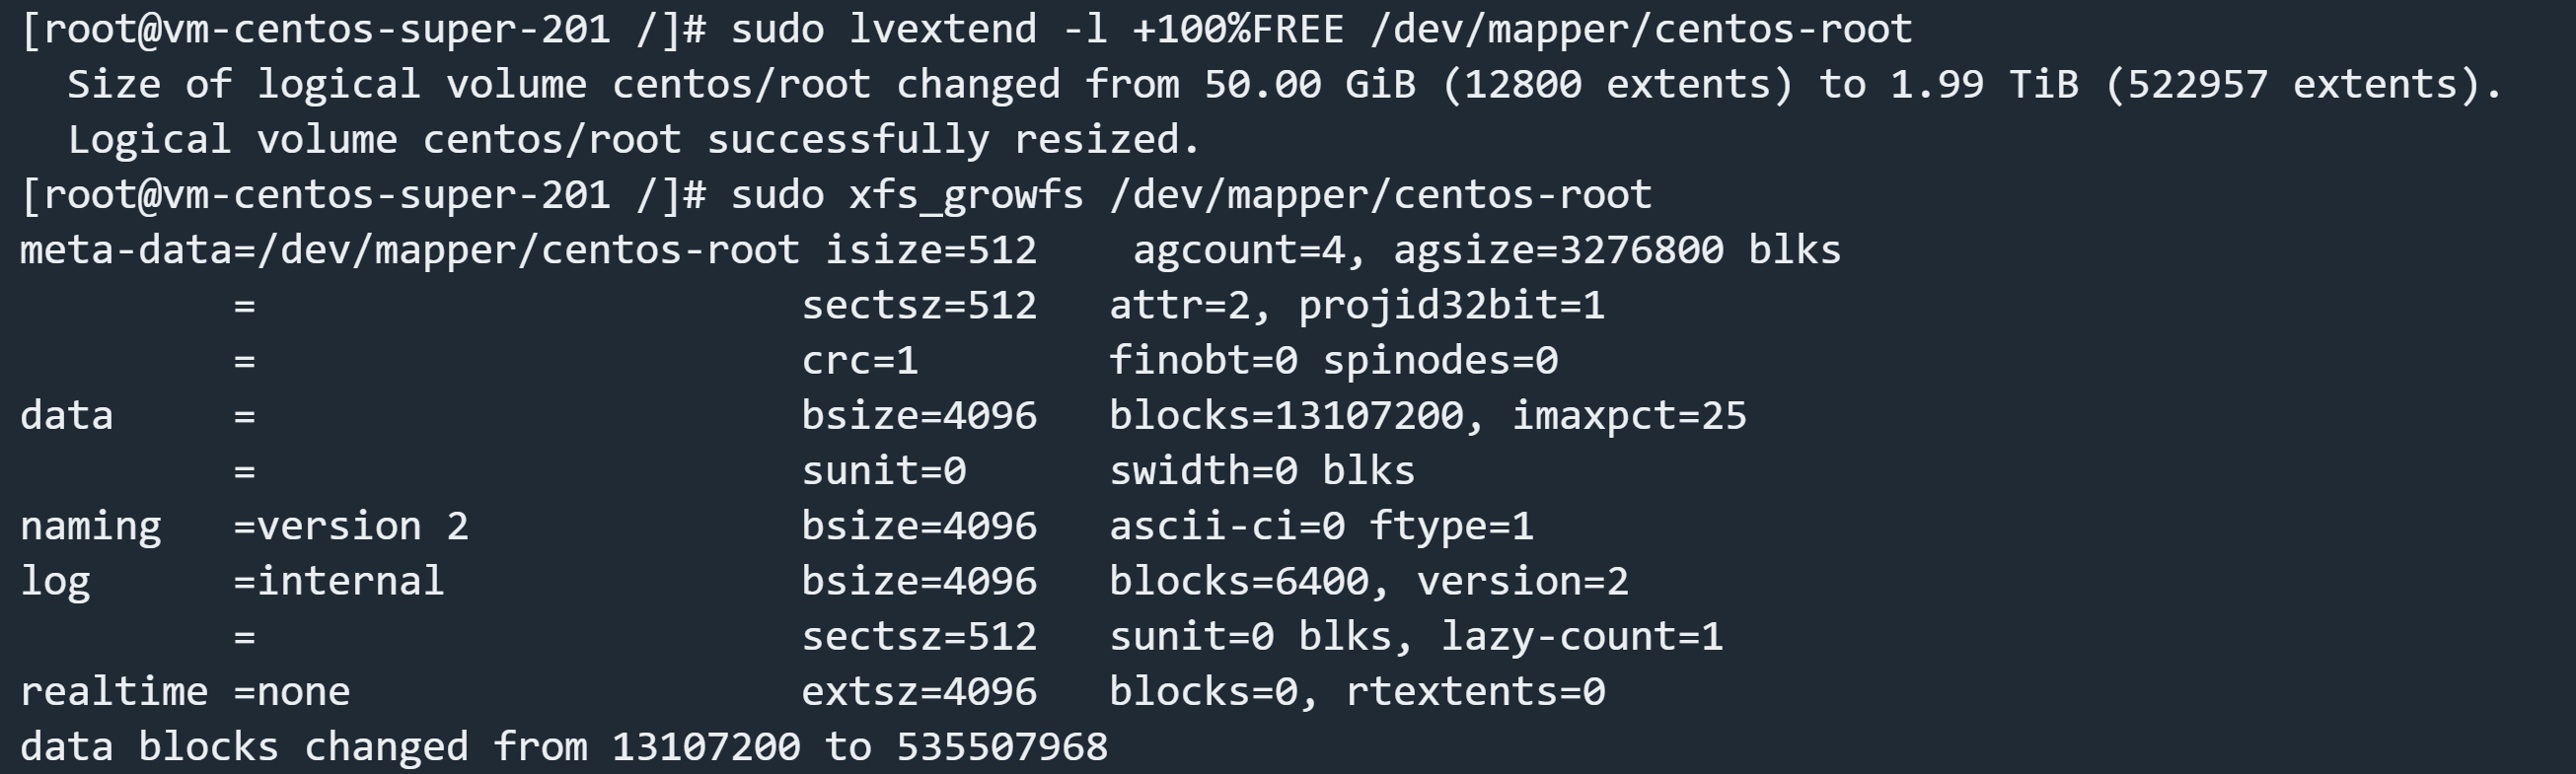
扩大根目录所在逻辑卷大小, 这里全部添加到根分区, 然后执行xfs_growfs 命令拓展文件系统
1 | sudo lvextend -l +100%FREE /dev/mapper/centos-root |
再次查看目录磁盘空间大小
1 | df -h |
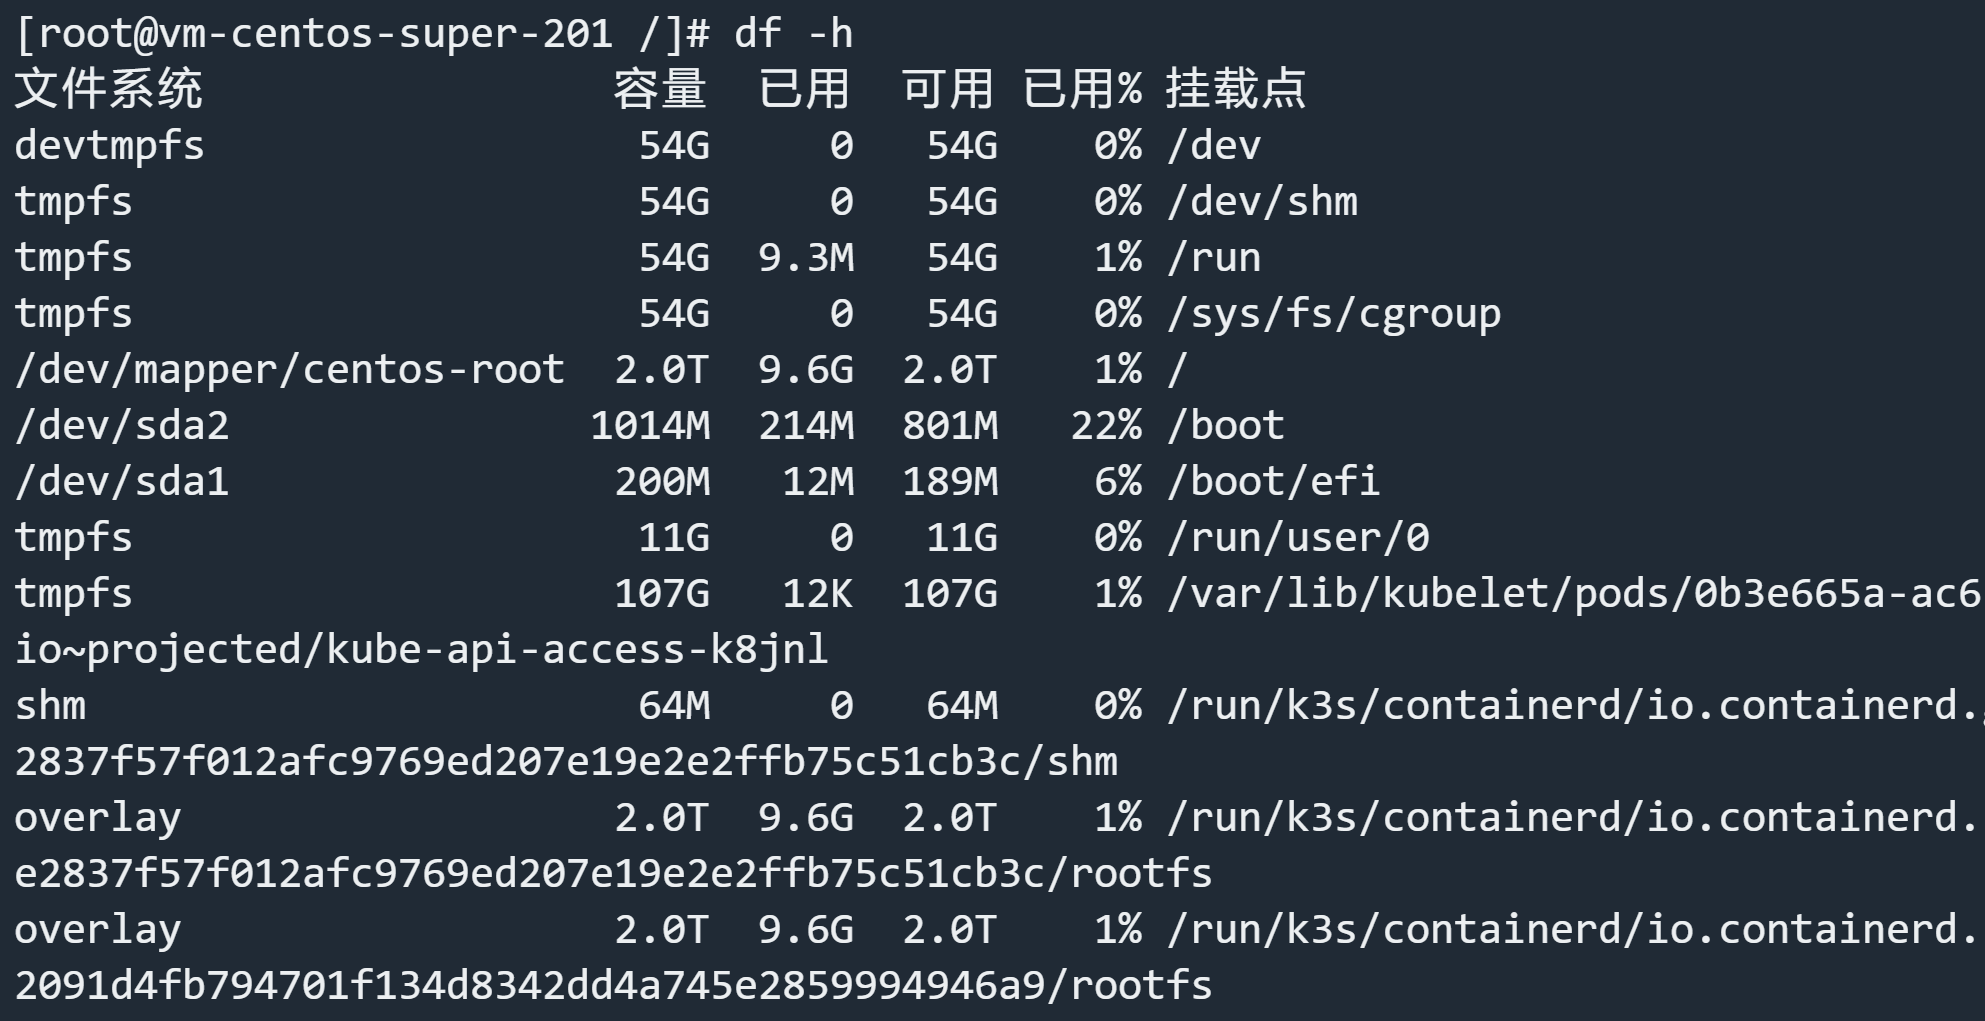
大功告成!